The start of Idle Boss Rush can feel slow.
You’re stuck between not doing enough damage and never having enough gold. However, the game’s skill tree has a few cheap, powerful nodes that can completely change your early game.
This guide provides a clear plan for your first two hours, showing you which skills to buy first to build momentum, earn resources faster, and unlock game-changing upgrades.
What “Cheap Nodes” Really Mean
Here, “cheap” doesn’t just mean low cost.
It means the best value for your early-game materials. These are skills that give you a huge power spike or economic boost for a very small investment.
They are often easy to reach from the start of the tree without needing to buy other expensive skills first.
The goal is to pick nodes that directly increase your damage or how fast you get resources, setting up a cycle where you get stronger faster.
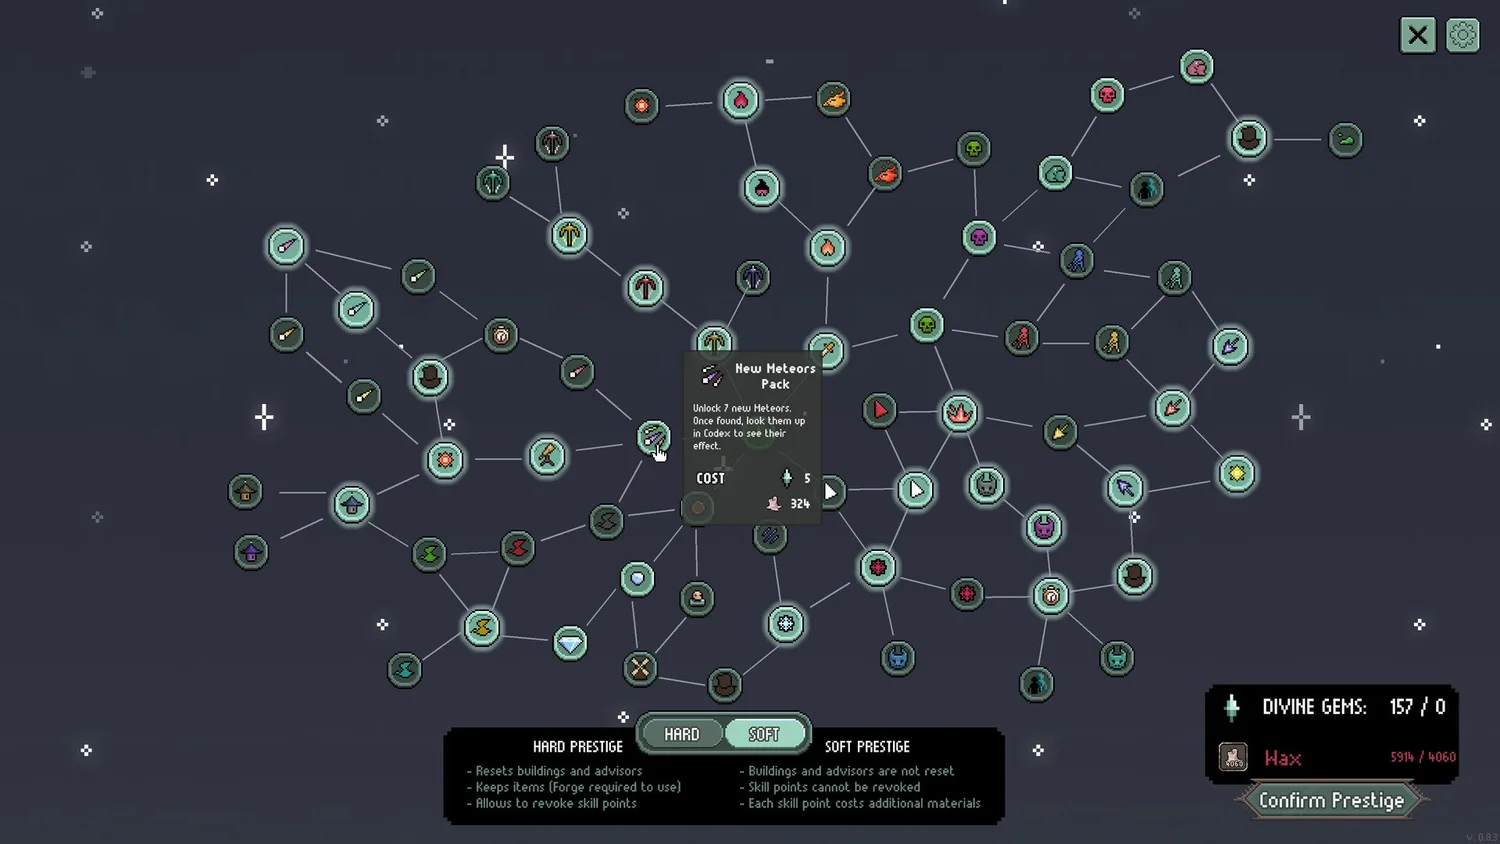
Soft vs. Hard Prestige: A Key Early Choice
Understanding the difference between a “soft” and “hard” prestige is crucial.
Soft Prestige: You get skill points to spend without losing your buildings or advisers. You can’t get your points back, but you don’t have to rebuild your town.
Hard Prestige: This resets your buildings and advisers back to zero, but you keep your items and can eventually re-spec your skill points.
For your first two hours, use soft prestige. This lets you add new skills on top of the town you’ve already built, making your character stronger without any downtime. Save your first hard prestige for when your items and skills are so strong that you can instantly blast through early bosses after resetting.
The Best Early Skill Route: A Step-by-Step Plan

First 30 Minutes: Lay the Foundation
1. Critical Hit Damage: Your First Buy
Your very first skill point should go into increasing your critical hit damage. A node that gives “+20% critical hit damage from all sources” is a fantastic starting point.
This is because it boosts every damage source you have—your warriors, your ballista, and even damage-over-time effects. It’s a universal multiplier that makes every other damage investment better.
Avoid the small “click damage” nodes; they offer a temporary boost but don’t help your overall progress when you’re not actively clicking.
2. The Ballista Efficiency
Two cheap ballista nodes are incredibly powerful early on: one that reduces the experience needed to level it up, and another that lowers its charge time.
The ballista is your most consistent source of damage. Making it level up faster and attack more quickly creates a strong, reliable base of damage that works while you’re idle.
This consistent damage ensures bosses die faster, which means more loot and gold, which then feeds back into making everything else stronger.
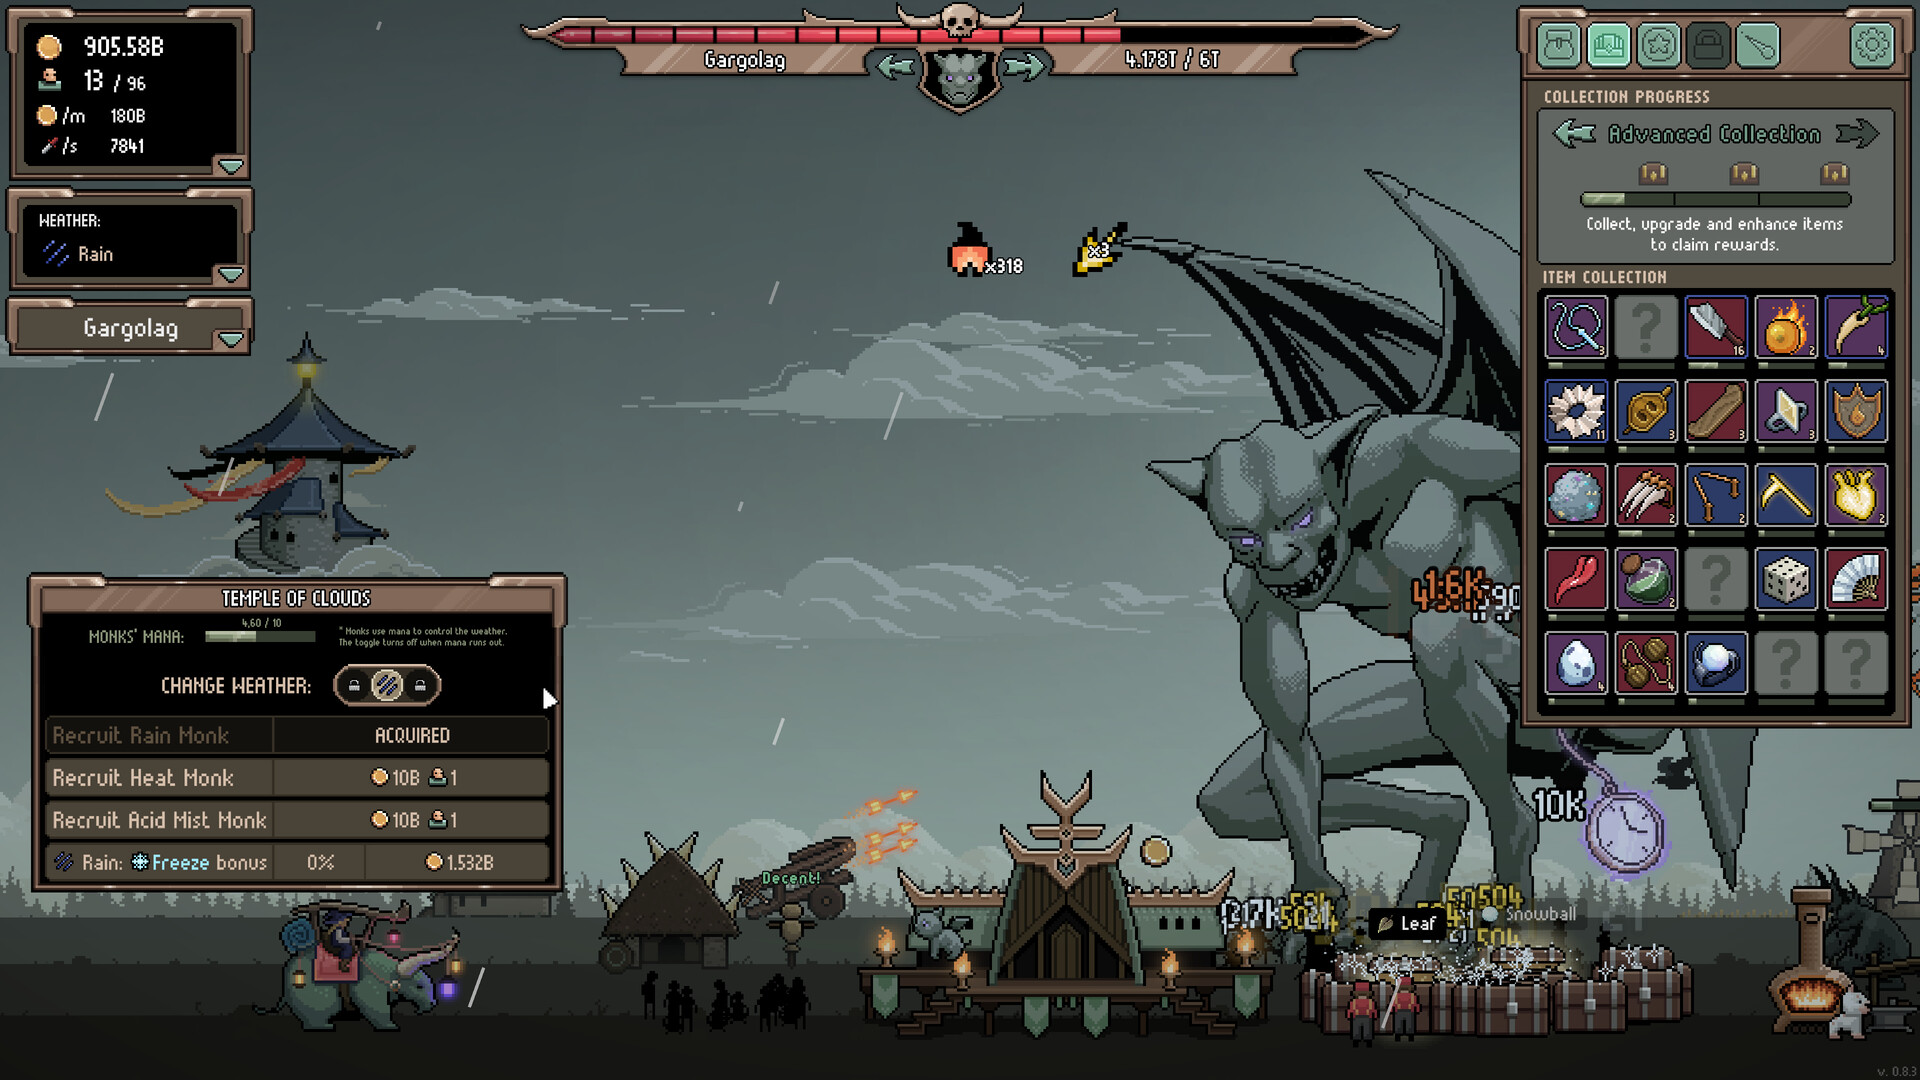
3. The Phoenix Burn
The single most powerful early-game damage source is the Phoenix’s burn effect. With the right skills, burn damage can quickly become responsible for over 90% of your total damage to bosses.
The key is to find the cheap skills that increase how often the Phoenix applies burn stacks and how much damage each burn “tick” does.
An early enhancement for the “Flaming Eye” item that makes “burns deal 150% more damage per tick” is a massive power spike. Focus on making your burn effect as strong as possible as soon as possible.
Minutes 30-60: Build Your Economy
1. Invest in Gold and Loot
Now, look for any low-cost skills that give you “Permanent Gold” or increase your “Loot Drop Chance.” It is easy to think only about damage, but a strong economy is what fuels your growth.
More money means you can buy better Advisers and structure upgrades sooner. More loot means more items to find and enhance. These nodes pay for themselves quickly.
2. Upgrade the Flint Shield
Find and upgrade the “Flint Shield” item. One of its best effects is reducing the respawn timer on bosses and resource fields.
This lets you farm bosses and collect gold from fields much more often, dramatically speeding up your entire progress loop. It turns idle waiting time into active farming time.
3. Adapt to Boss Resistances
You will eventually hit a boss that is highly resistant to your burn damage. Do not bash your head against the wall. Be prepared to temporarily swap an item or use a single skill point to lean on Poison or Freeze just long enough to beat it.
This flexibility is crucial for overcoming specific walls.
Minutes 60-90: Secure Power Spike
1. Conquer the Arena Spider
This is your single most important early goal. Focus everything on killing the Spider in the Arena quickly. The reward is a permanent 50% reduction to all Farmland upgrade costs.
This is not just a good bonus; it is a game-changing economic boost that will last for your entire playthrough. Use everything you have, even a temporary Poison build, to achieve this.
2. Reinvest Your Winnings
The moment you get that cost reduction, stop everything and pour all your saved-up gold into Farmland upgrades.
Because everything is half-price, your investment will double in value. Your gold income will skyrocket, funding all your future damage upgrades with ease.
Minutes 90-120: Prepare for the Great Leap Forward
1. Refine Your Burn Build
Use skill points from soft prestiges to grab more powerful Phoenix burn multipliers and skills that make the burn apply faster.
Your goal is to make the burn damage so overwhelming that it accounts for over 90% of your total damage on most bosses.
2. Time Your First Hard Prestige
Now, look for the right moment to perform your first hard prestige. The signal is when your Phoenix burn is doing most of your damage, your Ballista is strong, and you have a few good items like the Flaming Eye.
After the reset, you will vaporize the early bosses in seconds, allowing you to rapidly earn divine gems and unlock the next tier of skills without any slog.
What to Focus On (And What to Ignore Completely)

Phoenix Burn is Your Superstar: Any skill or item that makes burns apply faster, last longer, or hit harder is your top priority. This is your main source of boss killing power.
Ballista is Your Trusty Anchor: While Phoenix burn stacks up, the Ballista provides consistent, reliable damage. It is a better long-term investment for your gold than constantly buying more and more expensive warriors, whose cost balloons quickly.
The Economy is Your Engine: Skills and items that give you more gold or reduce costs are not boring—they are the engine that allows you to afford your incredible damage upgrades. Never underestimate them.
Skip These Early Traps:
Click Damage: This is a tiny, short-term boost. In an idle game, your automatic damage sources are far more important. Let your characters do the work.
Meteors and Light Spears: These sound fun, but they are weak and expensive early on. They contribute very little compared to your burn and ballista. Ignore them completely until your core engines are fully online.
Bad Alchemist Trades: The Alchemist often offers lopsided trades (like 10 of one material for 9 of another). Only trade if it directly lets you upgrade a key item like the Flaming Eye or Flint Shield. Otherwise, you are just wasting precious resources.
Final Checklist for Your First Two Hours
By the end of your second hour, you should have secured these core pieces. Use this list as a quick guide to see if you are on the right track:
✅ The universal +20% Crit Damage node was your first major purchase.
✅ Ballista XP reduction and at least one charge-speed upgrade are secured.
✅ The Flaming Eye item is found and enhanced to boost burn tick damage.
✅ Flint Shield is upgraded to reduce boss respawn timers.
✅ The permanent 50% Farmland cost reduction from the Arena Spider is unlocked.
✅ Your gold is being reinvested into Farmlands and Ballista damage.
✅ A planned hard prestige is executed, setting you up for a massive power leap.
By following this route, you transform the early game from a frustrating grind into a powerful, self-reinforcing cycle.
Your Ballista provides a steady damage base, your Phoenix burn deletes bosses, and your super-charged economy pays for it all.
Each of these “cheap” nodes was chosen because it gives you an immediate and compounding advantage, setting you up for long-term success and making your first two hours both efficient and enjoyable.