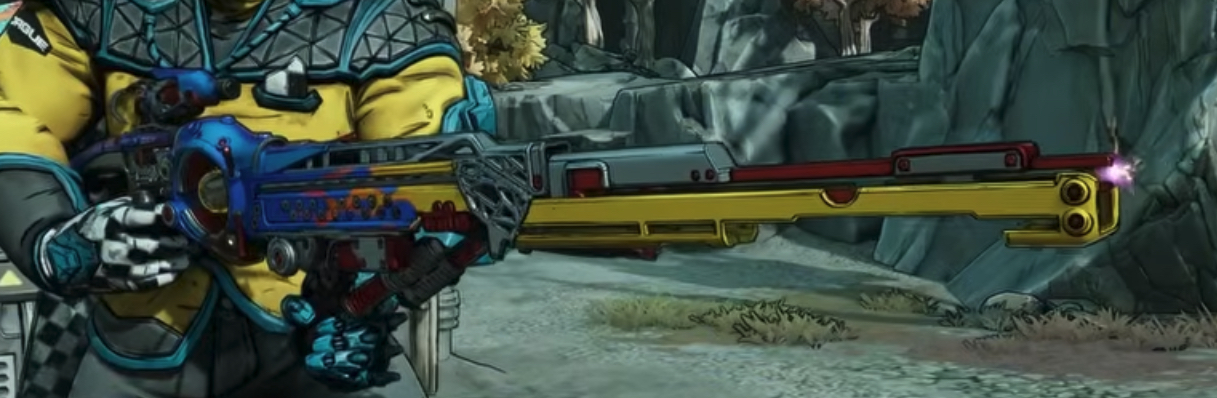
Borderlands 4 comes with a huge collection of weapons, you may want to know which legendary sniper rifles are really worth using.
The Borderlands games are known for their crazy weapon selection, and sniper rifles have always been popular with players who like accurate shooting, headshots, and smart tactics.
In this detailed guide, we’ll check out every legendary sniper rifle in the game right now, looking at what makes them good, what their problems are, and how they compare to other weapons
10. BoomSlang
Drop Source: World drop (random, or possibly vending machines)
Signature Perk: Bullet Pollinator – After reloading, your first critical hit will ricochet sticky projectiles to up to three nearby enemies.
Analysis:
The Boom Slang is at the bottom of our legendary list.
Even though its “bullet pollinator” effect might seem helpful for fighting groups of enemies—bouncing sticky bombs after reloading—there are much better ways to fire sticky bombs quickly.
Also, since it drops randomly anywhere, you can’t farm for it easily. In real fights, its damage and how good it feels to use just can’t keep up with other guns.
Most players should focus on other sniper rifles if they want high damage against bosses or useful special effects.
Tier Rating: D tier
9. Vamoose
Drop Source: Shadow Pelt (Augur Mine, snowy region)
Perk: Scarce – Unleashes the entire magazine after a short charge.
Analysis:
On paper, the Vamoose looks great because it fires your whole magazine in one burst—something “ripper” weapons do well in Borderlands games.
The problem is you need perfect aim: if you don’t hit every shot perfectly, enemies will move away and you’ll waste most of your damage.
This makes it annoying to use and not very good compared to other choices, especially when fighting fast-moving enemies. For most builds, it’s pretty weak.
Tier Rating: C- / D tier
8. Fisheye
Drop Source: World Drop
Perk: Ultima Ratio Ream – Fires wide, penetrating triple railgun shots with +40% critical damage.
Analysis:
The Fisheye is confusing. The description says it fires “wide, piercing” shots that are perfect for hitting multiple weak enemies at once.
But when you actually use it, the width seems broken or wrong—it shoots more like a regular sniper rifle. It’s okay against groups of enemies, but without reliable area damage, it’s hard to recommend for tough fights.
If they fix this weapon, it could become really good for clearing out groups of enemies.
Tier Rating: C tier
7. Symmetry
Drop Source: Timekeeper (Final Boss)
Perk: Bilateral – Fires from reserve ammo while charging, plus a 30% instant charge chance with order enhancements.
Analysis:
Symmetry is one of the more unique sniper rifles in Borderlands 4. It shoots while it’s charging up, then fires a bunch of shots when fully charged.
With order upgrades, it can potentially fire five shots almost instantly. Even with its clever ammo system, it doesn’t feel like a real sniper rifle and lacks power and reliability.
Its kinetic damage might work with some builds (like Bloodletter builds), but with so many better options available, most players will find it disappointing.
Tier Rating: C tier
6. Asher’s Rise
Drop Source: Oppressor (Early Story Boss)
Perk: Slow Burn – Crits apply status effects rather than boosting impact damage; available in multiple elements.
Analysis:
Asher’s Rise gives you options because it comes in different elements and you can get it early in the game.
Its slow burn feature means headshots stack status effects—great for certain builds like Harlo’s that get stronger from status effects, but useless for headshot-focused characters like
Vex. If you find one with Jacob’s parts, the bouncing shots add more depth, but overall, it’s decent but nothing special. You’ll find better options soon after you get this one.
Tier Rating: Middle of the pack
5. Stop Gap
Drop Source: Backhive (Claim Augur Mine, starting region; single element per drop)
Perk: Recon Figure – Firing rate decreases to 20%, but damage increases up to a whopping 750%.
Analysis:
Stop Gap is where things start getting really useful. As you hold down the trigger, each shot gets slower but hits way harder—the final shots can jump from 2–3k to over 20k damage per shot.
If you don’t let it overheat and time your shots right, this rifle can quickly take down bosses, even without perfect builds.
Getting only one element type per drop can be a problem against certain enemy shields, but Stop Gap definitely deserves a spot on your list if you need big damage spikes.
Tier Rating: B tier
4. Truck
Drop Source: Bio Thrasher Omega
Unlock Requirement: Complete “A Gassy Problem” side mission
Perk: Fixer Upper – Appears to slightly increase fire rate and magazine size.
Analysis:
Truck might not look special, but you can count on it. Since it’s a Jacob’s weapon, you can customize it a lot with upgrades that boost bouncing shots and multi-targeting, making it great for builds with Bloodletter or kinetic focus like Vex.
It’s a good all-around choice. Truck won’t win any style contests, but for steady farming and regular content, it’s hard to beat if you want reliable, controllable damage.
Tier Rating: B tier
3. Infinity Triple XL
Drop Source: Battle Wagon (Drill site, snowy region)
Perk: Pippin Hot Barrel (does not consume ammo while overheating) + Children of the Vault Magazine (unlimited mag size but possible break on overheat).
Analysis:
Infinity Triple XL is a fan favorite. Thanks to its crazy overheating system, you get a machine gun experience, firing 70–80 rounds during one overheat cycle without using any ammo.
It only seems to drop with fire damage, and its firing speed is great, though it gets hard to aim when you use it for a long time.
Add Vlad upgrades (chance for extra shots) and you have a top-tier weapon for boss fights or farming, as long as you can handle the unique heat system.
Tier Rating: A- / B+ tier
2. Stray
Drop Source: Pango Bongo (Drill site, Carcadia)
Perk: Fires two secondary projectiles that track and home in on nearby targets.
Analysis:
Stray is amazing for farming efficiently. Its auto-tracking ability means you barely need to aim; shoot anywhere and the shots will find enemies—even getting headshots!
With Jacob’s upgrades or accessory improvements, bouncing shots and damage can get even better.
It’s especially useful in areas with lots of enemies or boss fights with smaller enemies around. Stray’s kinetic scaling works perfectly with Bloodletter builds and other headshot combos.
Tier Rating: A tier
1. Borstel Ballista
Drop Source: Timekeeper (Also drops as world drop)
Perk: Propagation – Long-range spiraling set of projectiles (up to 18 hits), best at max distance.
Analysis:
The Borstel Ballista receives top honors, largely thanks to its propagation perk. Fired at long range, the bullet splits into a spiral of projectiles, capable of stacking immense damage against distant enemies—one of the few legendary snipers that fully reward long-range play.
Its synergy with Bloodletter is exceptional: the stacking damage sweeps up groups, and boss encounters practically melt away.
Notably, blood letter buffs persist for far longer with this rifle, enabling insane strategies for record-breaking damage runs. Add in crit dagger synergies and some builds can even one-shot boss-level threats with careful setup.
Tier Rating: S+ tier / Best in class
Final Thoughts
The landscape of sniper rifles in Borderlands 4 is varied, with each legendary bringing a specific flavor. While some are purely fun to use (Stray’s homing shots, Infinity Triple XL’s minigun antics), others define the meta (Borstel Ballista).
Your ideal choice will depend on both your character build and preferred playstyle, whether that’s status stacking, crit maximization, or raw AoE farming.
As always with Borderlands, experimentation is encouraged. New legendary snipers may yet appear via updates, balancing passes, or hidden boss encounters—so keep your eyes peeled, share discoveries, and let us know what builds and synergies you’ve uncovered.