

Are you tired of playing hide and seek with your wireless signal? Ever wondered why your wireless signal is excellent one day and flaky the next? If this fits the bill for your situation, then it is time to check or change your router’s Wi-Fi channel. If your device has a strong Wi-Fi signal and coverage, then the lag and slow speeds are most likely being caused by signal interference. When multiple Wi-Fi networks overlap, they cause interference, which in turn makes it longer to stream videos or load web pages.
What Wi-Fi channel should I use
Before jumping into changing your router’s channel, it is imperative to understand what channels are best to use. The standard 802.11 for Wi-Fi networks offers several ranges of radio frequencies, with 2.4 GHz and 5GHz bands being used widely. Each band offers several channels and ranges. Let us investigate each frequency band:
2.4 GHz band:
The 2.4 GHz band consists of fourteen channels, with each channel being 22 MHz wide with a 5 MHz gap between each adjacent channel. However, not all channels under this band are allowed in all the countries. For example, in North America, only 11 out of the 14 channels can be used. Choosing either channel 1, 6 or 11 under this band are recommended as these channels experience the least amount of overlap from other channels. The 2.4 GHz channels perform well with general browsing, watching videos, or using social media.
5GHz band:
Selecting a channel on the 5 GHz spectrum can minimize the number of other users on the same frequency. The 5 GHz band provides a total of 23 non-overlapping 20 MHz wide channels including many 40, 80 and 160 MHz channels. If you are looking to enjoy high-definition video streaming, then definitely use the 5GHz channels as they provide a much better throughput capability.
How do I change my Wi-Fi channel?
Changing a router’s channel is not as easy as channel surfing on your tv, but there are options to do so by logging into the admin interface of your router or by employing a channel scanner app. Once you know which Wi-Fi channel is the most optimum for your network, you can perform this task with ease.
Changing the channel by using the admin interface of your router
Perform the following steps to utilize the admin interface of your router to change your channel:
- Find your router’s IP address: If you are a Windows user, on the Windows search bar, type command prompt. Type ipconfig and press enter. The IP address displayed next to the Default gateway is your router’s IP address. For Mac users, it can be found by opening the Terminal app and typing netstat -nr|grep default. Once you hit enter, your router’s IP address will be displayed after the line which says “default”.
- Enter the router’s IP address into a browser: Now that you have the IP address, simply open a browser window, type it in and hit enter. You will then see a prompt where you can enter your router admin credentials to manually log into the router.
- Open the Wireless Settings: This is where you can find your channels and change them manually. The exact name and location of this option vary per device, but in most cases, you will have to click on Advanced Settings.
- Change your Wi-Fi channel: Click on the channel drop-down menu and then change your Wi-Fi channel.
Changing the channel by using a Wi-Fi channel scanner app:
When multiple routers are using the same channel, interference is bound to happen. While you can hop from one channel to another to prevent signal lag, it is more efficient and wiser to use a Wi-Fi channel scanner app. A WiFi channel scanner app like NetSpot helps in analyzing your channels and making sure your router broadcasts on a non-interfering channel.
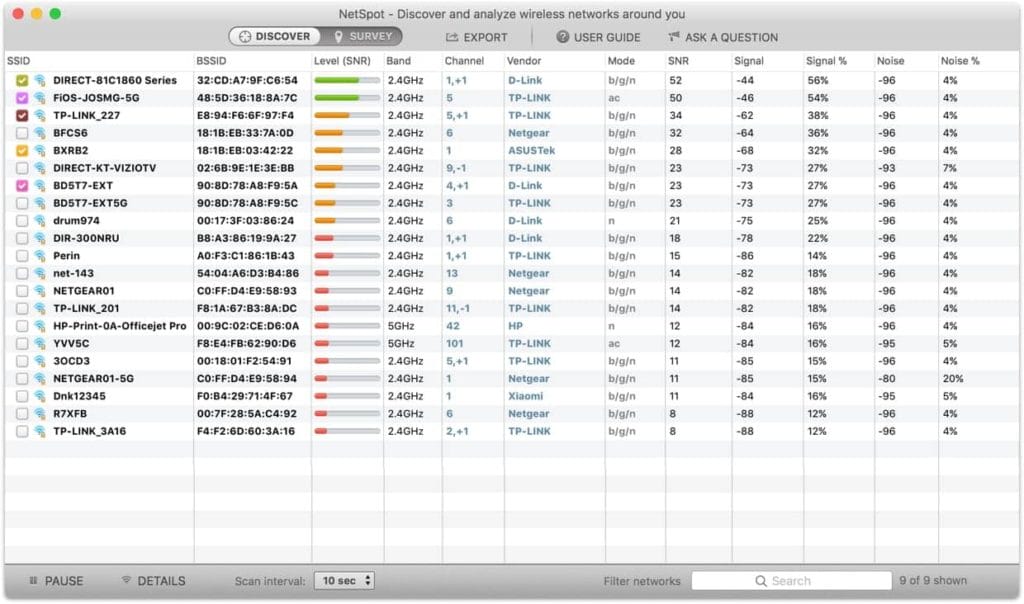
NetSpot is deemed to be one of the best Wi-Fi channel scanners by industry experts. It provides you with a WiFi site survey so you can switch to a less-crowded channel, yielding marked improvements in your wireless network speed. If you are using NetSpot as your channel analyzer, then after downloading and launching the app, select your Wi-Fi network by its name from the list of networks available in your area. Once you find your channel name under the SSID panel, you can look at the Channels column to see which channel your Wi-Fi network is utilizing. Furthermore, clicking on Details will show you the different frequency bands and their available channels.
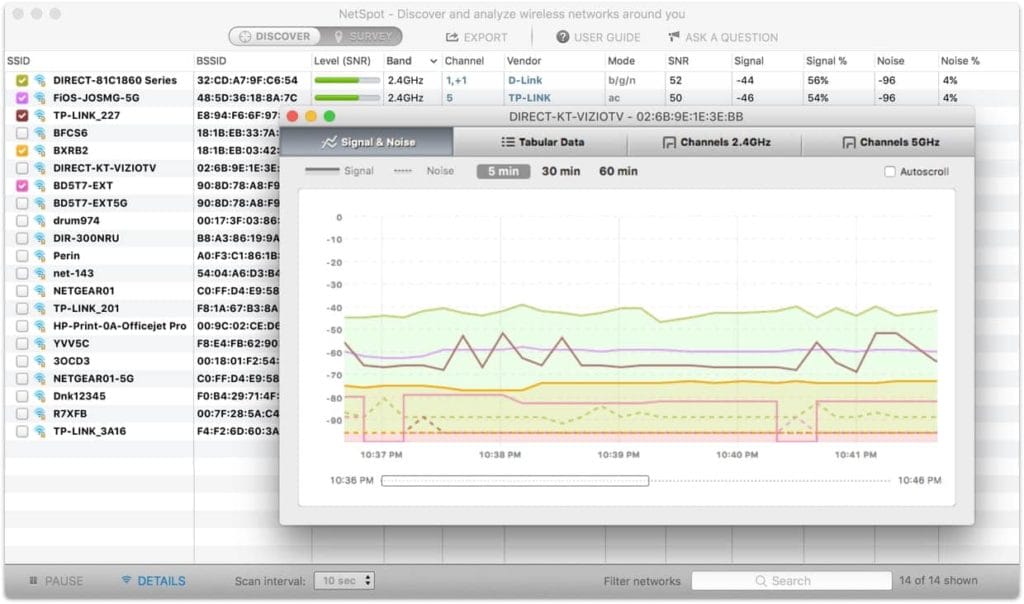
The best channels would be the ones that are the least occupied and a graph will show you how crowded a channel is.
Does Changing Channel Improve Wi-Fi?
Wireless networks transmit signals in various radio frequency ranges or channels. If you are sharing your radio frequency range with neighboring networks or devices like cordless phones, baby monitors, microwave ovens, or your neighbors’ network, chances are your network speeds will get sloppy over time. Changing your router’s channel helps with your network speed. Also note that if you are using a dual-band router, then changing to a 5GHz channel from the standard 2.4 GHz yields better throughput. High-quality, expensive routers will always try to select the least congested channel, but most routers will just use predefined channels even if it is not the most optimized option for your network. So, in a nutshell, changing your Wi-Fi channel greatly speeds up your wireless network.
Must Check
Crack Clash of clans without root
Clash of Clans for Android, IOS and PC
Best Strategy Games like Clash of Clans
Conclusion
Nothing can be more troubling than a flaky signal while you are in the middle of something important like sending out a work email or streaming your favorite Netflix show. Changing your Wi-Fi channel is a fruitful option if you live in a congested area or have many Wi-Fi networks nearby. Fortunately, it is quite easy to change your router channels manually or by investing in a high-quality channel scanner app like NetSpot. Once you make the switch to the right Wi-Fi channel, poor internet connections, buffering and streaming issues will be things of the past.


