Are you tired of struggling through The Division 2’s most challenging PvE content as a solo player?
Are you getting frustrated trying to beat The Division 2’s hardest missions by yourself?
Want to crush those tough legendary missions without waiting for teammates? You’re in the right place—this guide breaks down an amazing “Deadliest Solo PvE Build.”
We’ll show you the gear, abilities, and strategies that make this setup so powerful.
You’ll deal huge damage while staying alive in even the toughest fights. Whether you’re taking on Heroic or Legendary missions, this build will help you win.
The Core of the Build: High Damage and Unstoppable Survivability
This solo build is all about hitting hard and staying alive. It uses smart gear choices, weapons that work well together, and a special way of playing.
When you do it right, this build lets you deal tons of damage while healing yourself and taking lots of hits without dying.
Primary Concepts:
- Massive damage output: You can achieve it through rapid-fire weapons, an RPM (rate of fire) boost, and critical hit optimization.
- Exceptional survivability: You can gain it through Umbra Initiative gear healing mechanics, exotic talents, and bonus armor stacking.
- Independence from trophies or shields: Unlike builds reliant on the Memento Backpack, this setup doesn’t ask you for constant trophy pickups to maintain its survivability.
Let’s break down each component of this build, including the gear, weapons, and tips for mastering its mechanics.
Weapons: The Heart of the Build
Primary Weapon: The Blue Screen
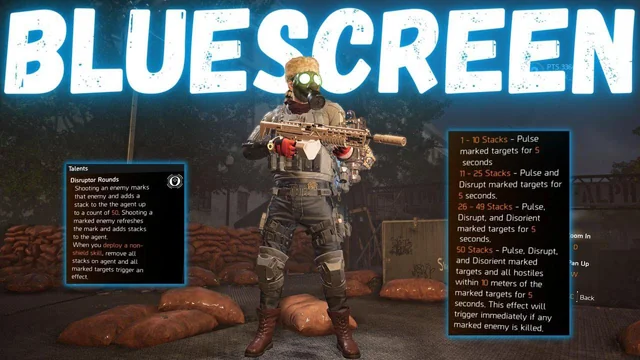
The Blue Screen exotic LMG is the key weapon in this setup. It gives you:
- High RPM (rate of fire): This weapon shreds enemies quickly, especially when paired with RPM boosts from the build.
- Disorient and crowd control: As a unique feature, the Blue Screen tags enemies, causing status effects like stagger and disorientation when fully marked.
- Large magazine size and fast reloads: This makes the weapon perfect for continuous firing and stacking key effects like Bloodsucker.
The versatility of the Blue Screen allows you to melt through heavy armored targets, control large groups of enemies, and provide consistent damage in solo situations.
Tips:
- Avoid using the “Pestilence” LMG, as you lose its damage over time debuff when swapping weapons. Stick to the Blue Screen or another high-DPS option.
- For mods, prioritize damage to armor, critical hit chance, and critical hit damage.
Secondary Weapon: Player Choice
- While the Blue Screen is the primary focus, you have flexibility for your secondary weapon. An AR with killer perks is an excellent complement to help cover different damage scenarios.
- Make sure your secondary weapon also aligns with your crit damage/crit chance optimization, ensuring you’re constantly capitalizing on DPS.
Sidearm: Orbit Pistol
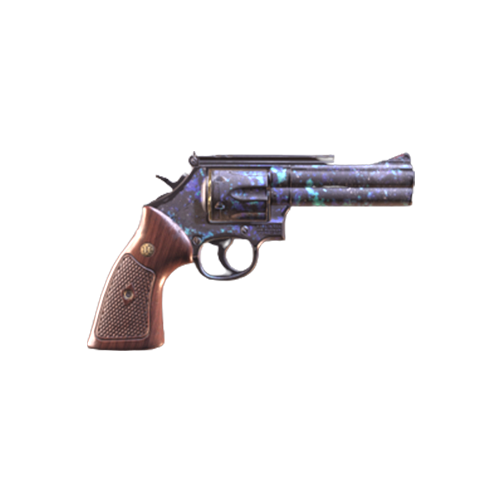
The Orbit exotic pistol is a fantastic option thanks to its boost to critical hit chance and critical hit damage, amplifying your DPS during engagements.
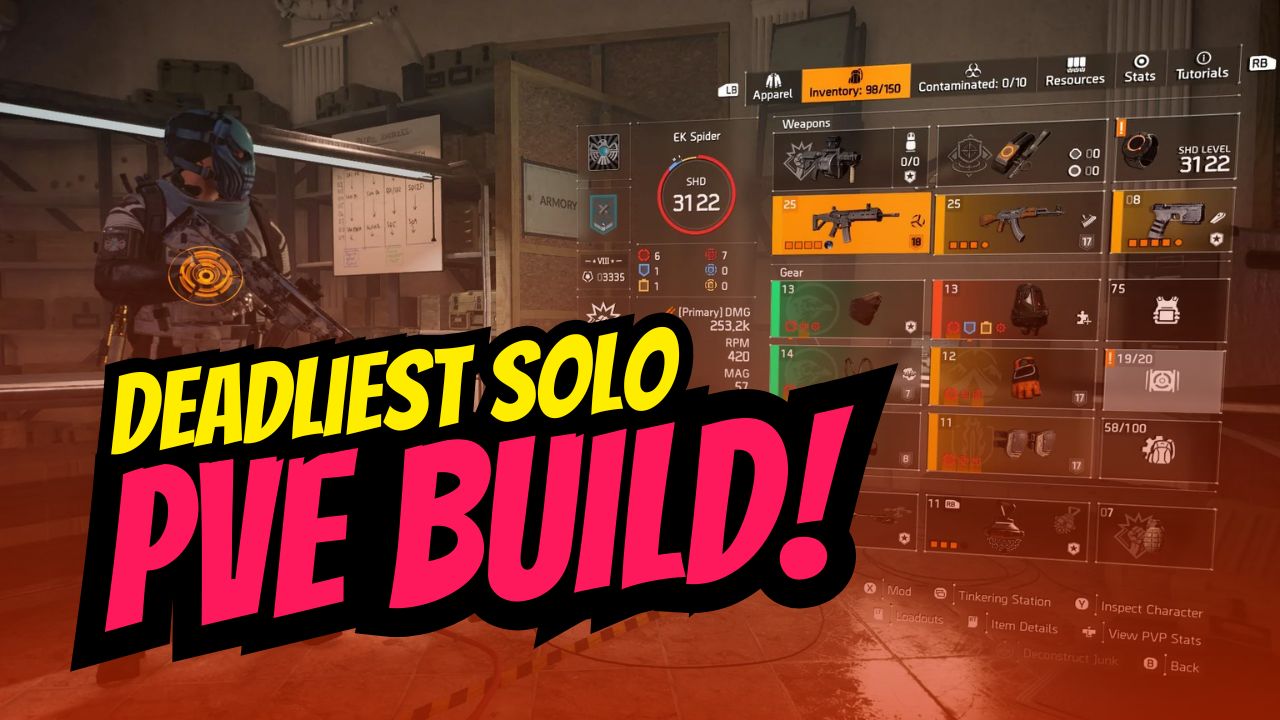
Gear Pieces: Umbra Initiative and Centurion Holster
1. Umbra Initiative Gear Set (4 Pieces)
The Umbra Initiative collection is the main highlight of this build. Its 4-piece bonus provides two key benefits:
- Out-of-cover healing stacks: While you’re out of cover, you build up stacks that heal you when you duck back into cover.
- In-cover damage stacks: Staying in cover accumulates stacks that supercharge your rate of fire and critical hit damage once you return out of cover.
Why Umbra Initiative is Perfect for This Build:
- Sustained engagement: The healing stacks continuously regenerate your survivability while fighting.
- High damage output in bursts: The in-cover bonuses (RPM and crit damage) make every engagement lethal.
Recommended Rolls:
To maximize damage, you’ll want Umbra Initiative pieces primarily focused on:
- Critical hit damage
- Critical hit chance
Specific Gear Pieces:
- Chest Piece: The Umbra chest piece doubles the stack capacity of the entire set, enabling even more powerful bonuses.
- Knee Pads, Gloves, and Backpack: These slots round out the 4-piece Umbra bonus, ensuring optimal healing and damage.
2. Centurion Scabbard Exotic Holster
The Centurion Scabbard exotic holster is another critical piece of this build. Its unique ability lets you switch between two different buffs depending on your playstyle:
- Offensive Buff: Boosts 20% rate of fire and 20% weapon damage. This is perfect for the rapid RPM and crit setup.
- Defensive Buff: Increases reload speed and magazine size, providing sustained fire for tricky situations.
This holster gives the flexibility to adapt your playstyle depending on the difficulty or your immediate needs, such as healing or maximizing DPS.
Pro Tip:
- Memorize the buff icons and practice weapon-swapping mechanics to ensure you are activating the desired buff at the right time.
Backpack: Liquid Engineer with Bloodsucker
For ultimate survivability, there’s no better choice than the Liquid Engineer Backpack with the Perfect Bloodsucker talent. This talent lets you:
- Gain bonus armor on kill: Defeating an enemy boosts your armor significantly, up to 120% bonus armor when fully stacked.
- This bonus armor serves as a buffer, drastically reducing the chances of being overwhelmed by enemy fire.
Alternatives:
- If you can’t access the Perfect Bloodsucker backpack, a standard Bloodsucker talent on a Cheska or Grupo backpack works fine. This is especially helpful for farming critical hit chance or damage synergies.
Specialization and Skills
Specialization: Technician
The Technician Specialization is highly recommended for this build thanks to its inherent armor on kill, enhancing your sustainability in the field.
Skills: Versatile Options
For skills, flexibility is critical. Here are the two recommended options:
- Defender Drone: Provides a consistent defensive layer by mitigating incoming damage.
- Decoy Drone: Distracts enemies, allowing you to reposition, heal, or focus fire.
How to Play the Build Effectively
This build requires some practice, as it features a mechanical loop involving cover and weapon swapping. With time, you’ll master it and dominate the battlefield in any PvE scenario.
Gameplay Loop:
1. Enter Cover and Stack Healing:
Start out of cover and take damage as you engage enemies, triggering the Umbra Initiative’s healing mechanic. Then duck into cover to regenerate your health.
2. Stack Damage in Cover:
While in cover, you accumulate damage stacks (crit damage and RPM). Monitor these stacks and prepare to unleash them when you pop out.
3. Pop out and Melt:
When the damage stacks are high, leave cover and release devastating firepower with your LMG. Rapid RPM and high crit damage will allow you to take down even heavily armored enemies.
4. Use Bonus Armor as a Buffer: Bloodsucker provides consistent bonus armor, allowing you to stay out of cover longer.
5. Cycle Weapon Buffs:
Every time you lose your Centurion buffs, swap to your secondary weapon and back to your primary weapon for a refreshed boost.
Why Choose This Build?
- Unmatched Solo Capability:
- The combination of bonus armor, fast healing, and massive burst damage makes even Legendary content accessible for solo players.
- Flexibility:
- This build is highly moldable. You can swap weapons, skills, or minor gear pieces to tailor it to your playstyle.
- Reliability Without Trophies:
- The reliance on Umbra healing and Perfect Bloodsucker enables consistent survivability without needing the constant trophy pickups of a Memento Backpack build.
Final Thoughts
This build for The Division 2 is one of the best setups for players going solo, whether you’re fighting through Heroic missions or trying to beat Legendary content.
By putting together the Blue Screen exotic LMG, the Centurion Scabbard holster, Umbra Initiative gear pieces, and Perfect Bloodsucker, you get an almost unbeatable mix of damage and staying power.
This build might take a mission or two to get the hang of, but it’s totally worth it.
Whether you’re eliminating waves of enemies or tanking through heavy fire, this setup will ensure that you dominate the battlefield with ease. So get your gear ready, practice how it works, and dominate The Division 2 with this amazing solo build!
What do you think?
Will you try this build out? Do you have other solo builds you’d suggest? Let us know in the comments!