
Nvidia just dropped DLSS 4.5, and it’s a solid step up for their already killer upscaling.
This new version fine-tunes the tech from DLSS 4, giving us better motion handling, sharper clarity, and rock-steady images.
If you want to push your RTX GPU further without sacrificing looks, I’ll walk you through how to turn it on and get the most from it.
Getting Started with DLSS 4.5
Understanding DLSS Preset Evolution
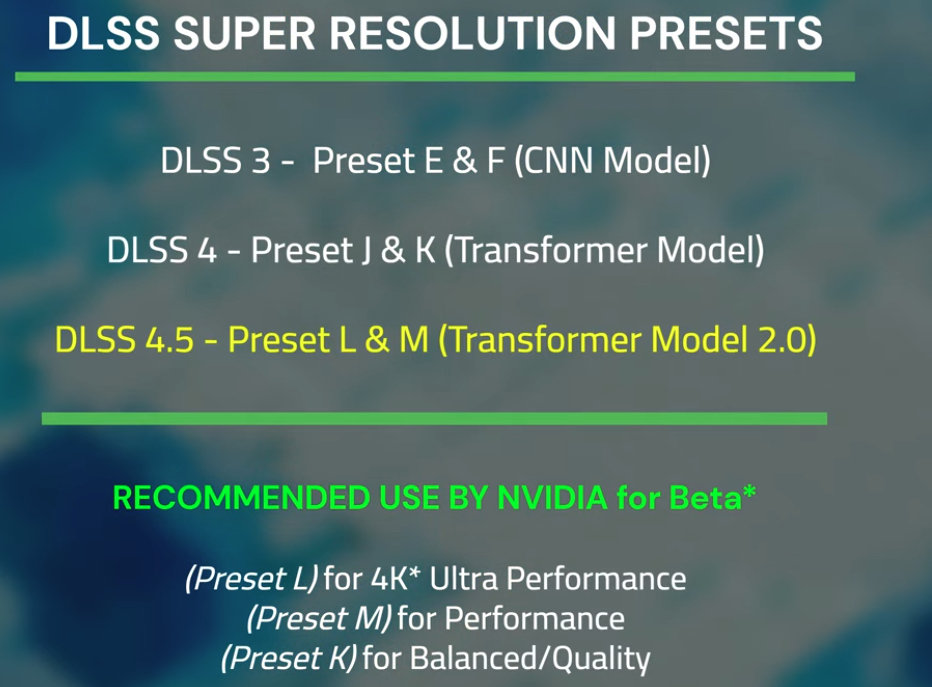
Nvidia’s Official Preset Recommendations
Nvidia has some specific advice on when to use each new preset, but don’t be afraid to play around with them yourself to see what looks best on your setup.
They tell us Preset L was built for Ultra Performance mode at 4K. But from what I’ve seen, it also works really well at 1440p. You can still get a great, clean image even starting from that lower resolution.
Preset M is specifically meant for Performance mode. There’s a good reason for this: if you try to use Preset M on Balanced or Quality mode, it gets a lot more demanding on your GPU than Preset K does. That extra workload usually isn’t worth the small visual gain in those scenarios.
Don’t count out the older Preset K, though. Nvidia still recommends it for Balanced or Quality modes. It hits a sweet spot between performance and image quality that’s hard to beat, especially if you’re gaming at 1080p or on a mid-range card.
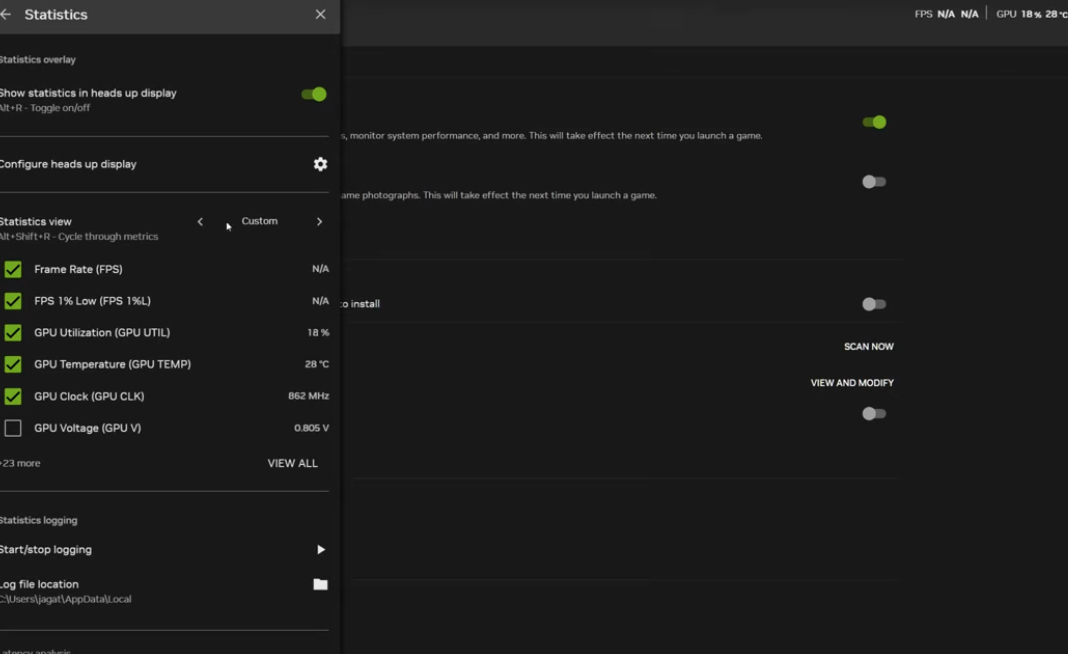
How to Turn On and Check Your DLSS Override
Performance Analysis and Trade-offs
Here’s the real talk: Preset L from DLSS 4.5 does ask a bit more from your GPU than the older Preset K or Preset E. But in my view, you get your performance’s worth. The jump in clarity, especially for things like distant foliage when you’re running at a super low internal resolution, is pretty striking.
Even with that extra cost, Preset K is still a totally solid choice. It really comes down to your own gear and what resolution you’re targeting. Your goal is to find your perfect balance of looks and frames.
Preset M follows the same idea. You’ll see a performance dip compared to Preset K, but the image gets noticeably cleaner and more stable. Is it worth it? That depends almost entirely on your graphics card. This is why Nvidia suggests saving Presets L and M for RTX 40 and 50 series cards.
There’s a hardware reason for that. DLSS 4.5 uses a heavier, more precise AI model. Older RTX 20 and 30 series cards handle the math differently (using FP16), which makes these new presets more costly for them.
My biggest piece of advice? Test this yourself game by game. Performance can vary a ton. What’s perfect in one title might be too much in another.
Image Quality Comparisons
Putting Preset K and Preset L side-by-side at 1440p, they look very close at a glance—which is a win for both. But look closer, especially in motion, and Preset L pulls ahead.
Things like confetti particles are clearer, outlines are sharper, and that annoying ghosting is basically gone. Preset K can still look a little blurry or unstable in fast scenes where Preset L holds firm.
The best part? On a modern card like an RTX 4060, using Preset L in Ultra Performance mode costs you almost no frames. You’re basically getting a free visual upgrade.
Now, comparing Preset K to Preset M at Performance mode tells a similar story. Preset M cleans up flickering edges and makes moving elements like NPCs look more solid.
But this quality boost has a steeper price—expect around a 15-20% hit to your frame rate. That’s exactly why Nvidia says to only use Preset M for Performance mode and not the higher quality settings.
The most surprising find? In my testing, Preset M at 1440p Performance mode (internal 720p) can actually look better than native 1440p.
Native resolution often shimmers and loses detail on things like trees, while Preset M stays rock solid. And you get the bonus of about 30+ extra FPS. If you’ve always avoided upscaling, this might be the preset that changes your mind.
My Quick Settings Guide by Resolution


