Are you finally looking forward to updating your PC from Windows 10 to 11?
Well, that’s good to hear!
But the only problem is, sometimes it doesn’t work.
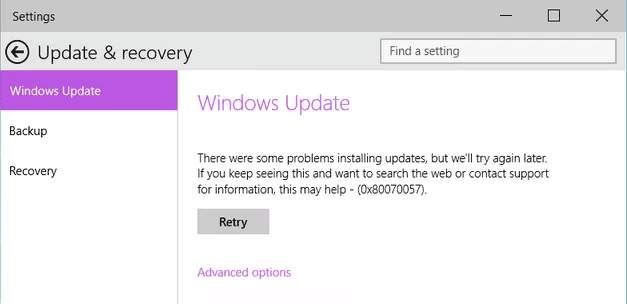
Many online users complain about getting Windows Update error code 0x80070057.
It’s the windows update version 0x80070057 that gives you the advantage of all the new features that Microsoft provides in their latest offerings of Windows 11.
So, if you’ve run into Windows update error 0x80070057, don’t worry: here are several ways to fix it. But first, let’s understand why you’re getting the error code 0x80070057 on your Windows 10 PC.
Causes of Windows Update Error 0x80070057
The first thing to do for you to troubleshoot this error is to check if there are any corrupted files in your Windows update folder. This can be done by using third-party PC cleaning software such as CCleaner. If you find some corrupted files, then it’s time for you to delete them and see if the error persists during the following Windows Update process.
If possible, try resetting your Internet connection settings by going through these steps:
- Click Start > Control Panel > Network Connections
- Right-click on any active network connection and select Properties from the dropdown menu
- On the Network Connection Properties window, click Troubleshoot button at the bottom left corner of the window
- Select the Reset network adapter option and click the Next button
Now restart your computer again after resetting network adapter settings and see if this initial troubleshoot fixes the 0x80070057 problem in the Windows Update program on your PC or laptop.
If this troubleshooting measure fails, you must apply some advanced fixes mentioned in the following section.
How to fix Windows update error 0x80070057?
If you are facing this issue, don’t worry. You can still fix Windows update error 0x80070057 by following these steps:
Open Command Prompt with administrative rights and run the following commands:
- net stop wuauserv
- net stop cryptSvc
- net stop bits
Then, rename the following folders: C:\Windows\SoftwareDistribution to SoftwareDistribution.old; and C:\Windows\System32\catroot2 to catroot2.old.
Stop wuauserv file
To stop wuauserv, you must open a command prompt window with elevated privileges. You can do this by right-clicking on the Start button and selecting “Run as administrator.” Then, type cmd, press Enter, or click OK in the box that pops up.
The command to stop wuauserv is net stop wuauserv; however, if you tried that command before reading this article, it may not have worked for you because Windows Update isn’t preinstalled on your computer anymore! Either way – let’s find out if your computer even has an update service running at all by checking what drivers are currently running:
net start | findstr /C:”wuauserv”
Stop cryptSvc File
Now, to stop the Cryptographic Services Service, you need to open the Command Prompt and run this command:
net stop cryptSvc
Restart net stop bits
To stop and restart the bits service, open the command prompt as an administrator and run the following commands:
net stop bits
net start bits
Rename certain System Files
- Rename SoftwareDistribution.old to SoftwareDistribution
- Rename catroot2.old to catroot2
- Rename SoftwareDistribution to SoftwareDistribution.old
At last, Create a copy of the catroot2 folder. Rename catroot2 to catroot2.old and rename the .old file to .catroot2, then try updating again.
If you are running Windows 8 or later, reboot your computer and try updating again.
Net start wuauserv
Open an elevated Command Prompt window. To do this, type cmd in the search box on your taskbar and then right-click Command Prompt and choose “Run as administrator.”
In the command prompt window that opens, type net start wuauserv and press Enter.
If you’re prompted for an administrator password or confirmation, enter it. Your computer will then restart the Windows Update service and re-check for updates. If you still experience errors after running these commands, continue to step three below.
Net start bits
If you want to resolve the problem on your own, try these steps:
- Please restart your computer and make sure it boots into Safe Mode (press F8 as soon as you press the power button)
- Open Command Prompt as an administrator by right-clicking on its icon and selecting Run as Administrator. If you see any pop-up asking for permission, click Yes.
- Type in net start bits and press Enter. This will restart the Background Intelligent Transfer Service, which may fix this error.
Additional Ways to Fix Windows update error 0x80070057
The Windows Update Error 0x80070057 can be fixed easily by following the steps given below.
- You must be in an Administrator account when you are running these commands so that you can access all the files on your PC. This is because if you try to do this while using a standard user account, it will only work for one session and not permanently. So change to an administrator account and log out of all other statements currently open on your computer before proceeding with this fix.
- Now navigate to the folder containing cmd (the command prompt) by typing its path into Windows Explorer or any other file explorer window that comes up when searching for ‘cmd’ in the Start Menu search bar or File Explorer navigation pane. For example, if cmd is located at C:\Windows\System32\ then type cd \Windows\System32 into an empty field where ‘Enter’ will get automatically typed after pressing enter key without needing any further keystrokes like hitting spacebar first etc.,
Restart your PC to Complete Windows 10 Update Installation
After troubleshooting your PC with the aforementioned advanced solutions, here’s how you can restart your PC to apple them:
- Press the Windows key + C on your keyboard, then click Shut down or sign out.
- In the Shutdown or sign out the window, click Restart (not Shut down).
Conclusion
So, that’s how you can fix the Windows update error 0x80070057 popping up at the time of the Windows 11 upgrade.
After updating your PC to Windows 11, if you don’t like it, don’t roll back to Windows 10. Instead, I recommend you look at these popular Linux distros as Windows 11 alternatives.
That’s all for now.
I hope that this article has been helpful in fixing your Windows update error 0x80070057. If you have any further questions or concerns, please leave them in the comments section below.