Frustrated with finding it hard to locate a specific FaceTime call in your call history?
I understand how time-consuming it can be to manually scroll through your call history, trying to find that one call you need to reference. This difficult process can cause miscommunications or delays, leaving you exasperated.
Don’t worry! This easy-to-follow guide, “How to Check FaceTime Call History?” simplifies the process, helping you quickly retrieve past call details.
Start reading now and find your FaceTime call history and make your life easy!

What is FaceTime call history?
FaceTime call history is a feature that allows you to see your previous FaceTime interactions. It logs all sorts of calls, including incoming, outgoing, and missed calls.
It typically shows the last 100 entries, although more can be stored. The call history can be accessed through the FaceTime application on various Apple devices such as iPhones, iPads, and Macs.
This history can be specifically useful when trying to recall past interactions or calls, keeping track of your activity, and even for troubleshooting purposes.
Basic Requirements for Checking FaceTime Call History
Before you check your FaceTime call history, you also need to be aware of which devices and software versions support it and how to ensure your FaceTime application is set up correctly. So here’s what you need to know:
Devices that Support FaceTime
FaceTime is Apple’s built-in video and audio calling app and is supported on nearly all Apple devices, including:
- iPhone (iPhone 4 or later)
- iPad (2nd generation or later)
- iPad Pro (all models)
- iPad Mini (all models)
- Mac (2011 or later running Mac OS X Lion 10.7 or later)
Necessary Software Versions and Updates
In order to fully utilize FaceTime and its call history feature, your device needs to be running on a supported software version. Below, you’ll find the minimum software versions that support FaceTime:
| Device | Minimum Software Version |
|---|---|
| iPhone | iOS 4 |
| iPad | iOS 4.2 |
| iPod | iOS 4 |
| Mac | Mac OS X Lion 10.7 |
It’s also critical to keep your device updated with the latest software updates from Apple, as this ensures that you have the latest features and security patches.
Ensuring FaceTime is Turned On and Set Up Correctly
Finally, you need to ensure that FaceTime is turned on and set up correctly on your device. Here are the steps to accomplish this:
- Go to Settings on your device.
- Scroll down and tap on FaceTime.
- Make sure the toggle for FaceTime is turned on (green).
- Sign in with your Apple ID if prompted. Otherwise, ensure that the correct Apple ID is displayed at the top.
- Make sure that you have a stable internet connection, as FaceTime requires this to function correctly.
Now that you’ve checked these basic requirements, you’re all set and ready to check your FaceTime call history. Proceed with the instructions that follow in the sections ahead.
How to Check FaceTime Call History on iPhone?

Now that we’ve got the basics out of the way let’s move on to how to check your FaceTime call history on an iPhone.
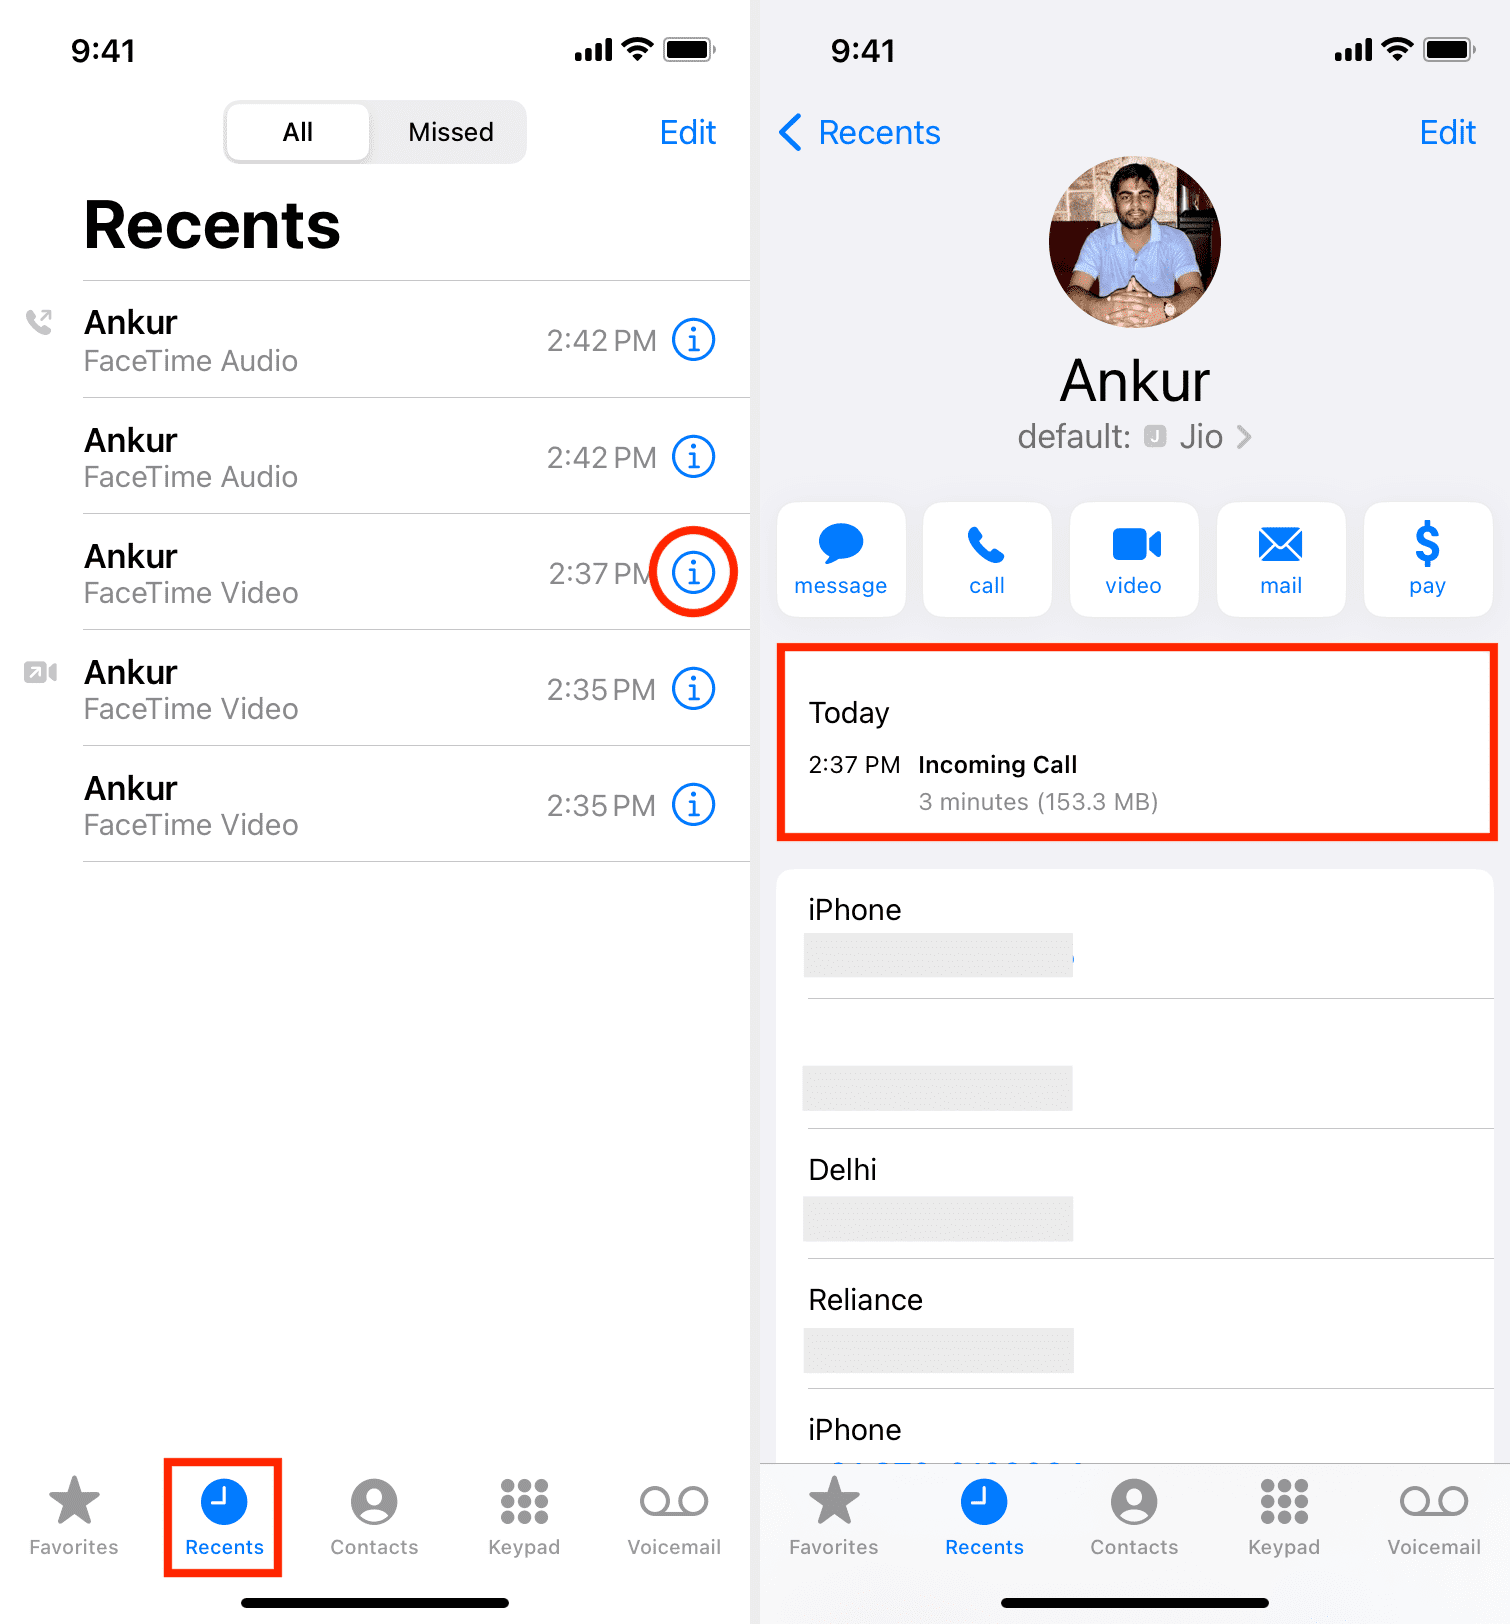
- Open your FaceTime app by clicking on its icon.
- Once open, click on the ‘Recent’ tab located at the bottom of the screen. This will show you your entire FaceTime call history.
How to Interpret the Data?
In your call history, you’ll see several symbols and colors which represent different types of calls:
- Red symbols: These denote missed calls.
- Outgoing calls: These are marked with an upward arrow next to the contact or phone number.
- Incoming calls: These are marked with a downward arrow next to the contact or phone number.
Deleting Call History or a Specific Call Info from the History:
If you need to delete your entire call history or a specific call, here’s how to do it:
- Swipe leftover the call info that you want to delete.
- Click on the ‘Delete’ button that appears.
How to Check FaceTime Call History on iPad?
The steps for checking FaceTime call history on an iPad are very similar to those on an iPhone. The only difference would be slight changes in the layout due to the larger screen size.
How to Check FaceTime Call History on a Mac?
Checking your call history on Mac is just as easy. Let’s get to it:
- Open the FaceTime app on your Mac with a simple click.
- Click on the ‘Video’ or ‘Audio’ tabs at the top of the interface.
- Scroll through your call history using the trackpad or a mouse.
As with the other devices, the meaning of the arrows and symbols remain the same: incoming calls are denoted by a downward arrow, while an upward arrow represents outgoing calls.
Archiving and Filtration of FaceTime Call History
While Apple does not provide direct features for archiving or filtering your FaceTime call history, you can still back up your entire device to iCloud, which will also back up your call history.
Backing Up Your Device to iCloud
Here’s how to back up your device (iPhone, iPad, or iPod touch) to iCloud:
- Ensure that your device is connected to a Wi-Fi network.
- Go to Settings > tap on your name at the top > tap iCloud.
- Scroll down and tap iCloud Backup.
- Tap Back Up Now to manually initiate a backup.
For Mac users, follow these steps:
- Click on the Apple menu () > System Preferences.
- Click on Apple ID and sign in if required.
- In the left sidebar, click on iCloud.
- Click on iCloud Drive Options and select the data you wish to backup.
Keep in mind that your backed-up data, including FaceTime call history, will be stored in the cloud and can only be accessed after restoring the device from an iCloud backup.
Common Issues Accessing FaceTime History
Issue 1: Can’t See Call History on FaceTime
If you can’t see your call history in the FaceTime app, there are several things you can check:
- Ensure that your FaceTime app is up-to-date.
- Make sure you have a stable internet connection (either Wi-Fi or cellular data).
- Double-check that you’re signed in with the correct Apple ID.
- Restart the FaceTime app by closing and reopening it.
Issue 2: FaceTime Call History Not Showing Up on Recent Calls
If your FaceTime call history isn’t showing up on your recent calls, try the following solutions:
- Restart your device by turning it off and then on again.
- Open the FaceTime app and check if the call history appears.
- If the issue persists, sign out of your Apple ID in the FaceTime app and then sign back in.
Concluding Lines
Well, there you have it!
Now that you’ve discovered our handy guide on “How to Check FaceTime Call History,” it’s time to put it into action.
That’s all for now.
If you’re stuck somewhere in the process, feel free to reach us in the comments below.


