

In this guide, we’ll cover everything about the Void Vessel Mission.
We’ll start with the suggested builds, then talk about weapon choices, important mission details, chest locations, and boss strategies.
Whether you’re new to the game or have been playing for a while, this guide will help you master the Void Vessel Mission.
Recommended Build: Frina
Before we get into the details, it’s important to know that you can use different characters for the Void Vessel Mission.
Recent improvements to characters like Blair and Bunny have made them good choices too.
But this guide will focus on Frina, as she’s thought to be one of the best and fastest characters for this mission.
Frina Build Overview
The suggested build for Frina aims to make her as effective as possible and ensure a smooth and fun experience. Here’s a quick look at the build parts and why they’re important:
- Transcendent Mod: Contagion – This mod makes Contagion better, helping Frina spread damage.
- More HP – Adds toughness, helping you survive longer.
- Tech and Toxic Focus – Reduces cooldowns and increases damage.
- MP Collector, Nimble Fingers, and MP Conversion – These mods make it easier to have enough MP to use abilities often.
- Skill Expansion and Maximize Range – Important for spreading damage well.
- Tech Amplification and Toxic Amplification – Replace crit mods with these to make skills stronger, as Frina isn’t as good with crits.
Weapon Choices
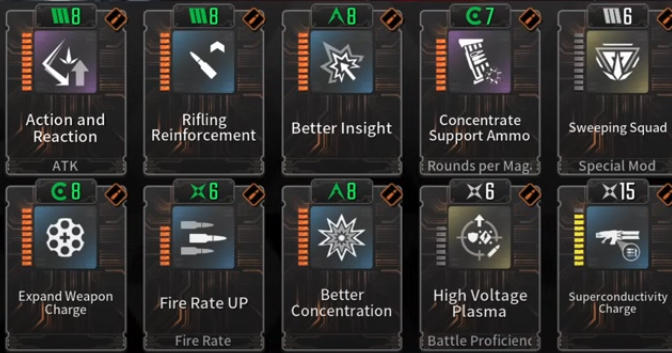
The main weapon for this build is the Voltia. It works really well in the Void Vessel Mission because it can chain damage, which makes it much easier to deal with shielded enemies. Here’s how to build the Voltia:
- Action Reaction and Rifling Reinforcement – Make it fire faster and do more damage.
- Better Insight and Better Concentration – Focus on critical hits.
- Fire Rate Up – Makes it fire faster.
- Concentrate Support – Makes it more accurate and stable.
- Ammo Expand and Weapon Charge – Give you more ammo and make the weapon charge faster.
- Super Conductivity Charge – Makes the electric damage better.
- Sweeping Squad and High Voltage Plasma – Give extra damage and help control crowds.
Secret Garden and Fallen Hope
Besides the Voltia, the Secret Garden is used because it always does critical hits, making it really good at quickly killing enemies. The key mods for Secret Garden include:
- Action and Reaction – For more critical hits.
- Rifling Reinforcement and Fire Rate Up – Make the weapon work better.
- Insight Focus and Concentration – Make critical damage better.
- Priority Focus Fire and Weak Point Sight – Help you target weak spots for maximum damage.
- Fire Enhancement and Better Insight – Make the weapon even better overall.
Fallen Hope is used for Frina’s ultimate ability. Key mods include:
- Compulsive Magazine and Expand Weapon Charge – Make it fire faster and charge quicker.
- Sharp Precision Shot – Makes it more accurate.
- Enduring Legacy – To do the most damage during the ultimate.
Reactor and External Components
For the reactor, the Toxic Tech Reactor with cooldown and duration is recommended. This setup makes sure you can use your abilities often by reducing cooldowns and making effects last longer.
For external components, the Slayer Set is the best choice. It makes skill power 26% stronger, which really increases damage.
If you need to be tougher, you can use a mix of two Annihilation and two Hunter auxiliary components with max HP and max defense.
Inversion Reinforcement
Inversion reinforcement gives extra boosts to Frina’s performance. The suggested setup includes:
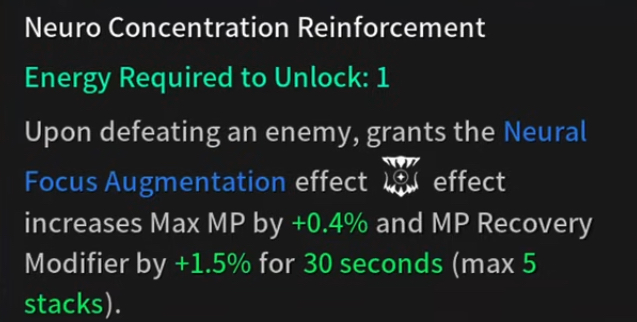
- Neuro Concentration Reinforcement – Makes MP recovery and max MP better.
- Electric Focus Rounds – Makes electric damage stronger.
- RK Boost – Reduces cooldowns and makes skills faster.
- Quantum Domain Tree – Gives extra skill effect range and skill power.
Mission Mechanics and Shields
The Void Vessel Mission has randomly created zones with three different outcomes each run. Here’s a breakdown of the types of shields you’ll see and how to deal with them:
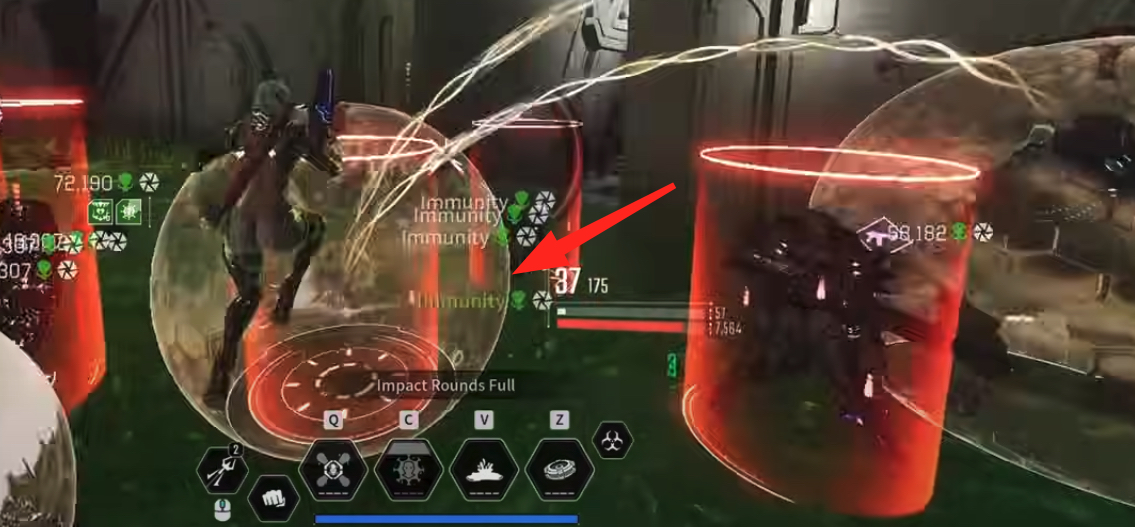
- Blue Shields – Need skill damage to break. Use any character skill to clear these shields.
- Yellow Shields – Need weapon damage. The Voltia works really well for chaining damage to multiple yellow shielded enemies.
Chest Locations
There are four types of chests in the Void Vessel Mission, each with a different purpose:
- Experimental Chest – Gives materials for making the Fellow. Ignore unless you need to research the Fellow.
- Special Chest – Drops materials for pet level-up blueprints.
- Broken Chest – Contains materials for making Keelin. Collect only if you need to research Keelin.
- Genetic Chest – The most important chest, containing blueprints for pet level-ups. Focus on these chests for long-term benefits.
Detailed Chest Locations
- Conveyer Building – After the long jumping puzzle, turn left to find the first chest room, then another chest room right across.
- Second Room of Elites – Past the lasers, shoot the shield and jump down to find the next chest room.
- Lasers on the Ground – After clearing yellow shielded enemies, look straight up to find a hidden chest room.
- Disconnected Wires – Several chests can be found in the room with floating platforms and wires.
Final Boss Strategy
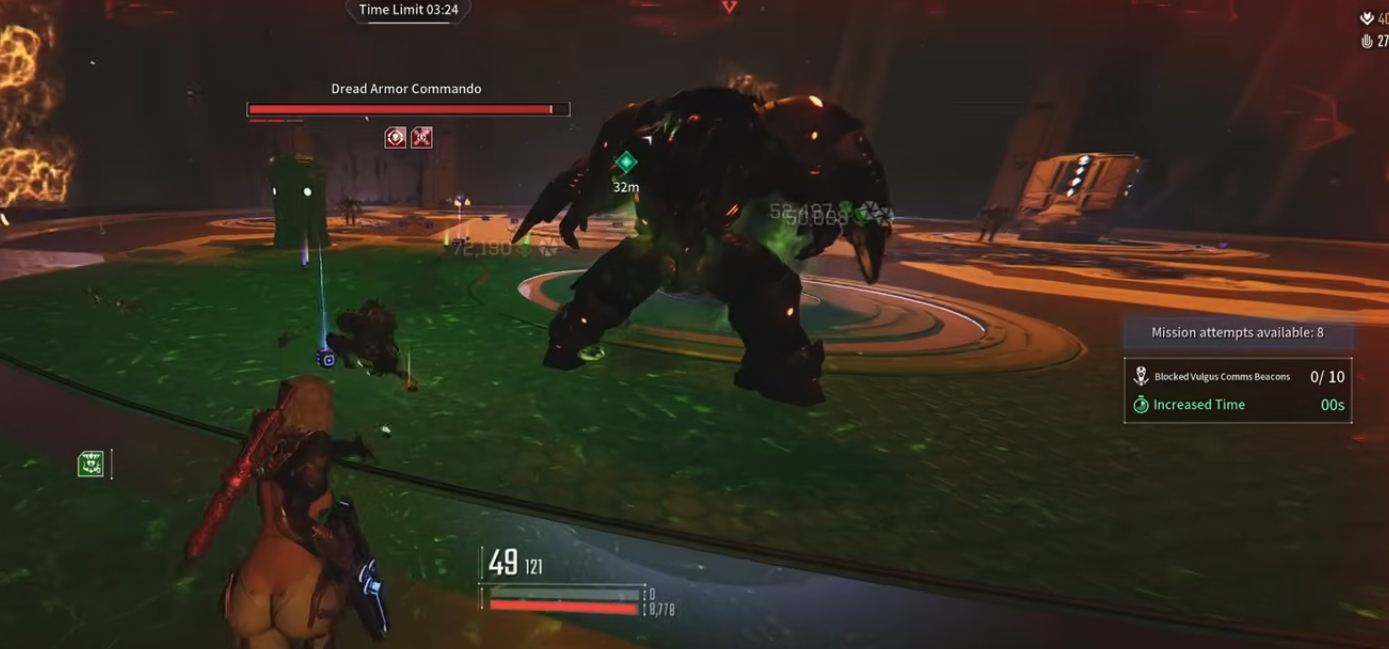
The final boss fight has three phases:
Phase One
Clear the ads to make the boss appear. Use Frina’s first and third abilities, along with the Voltia, to quickly take down the boss’s shield.
Intermission One
The boss will activate a wider shield and call in ads. Use the Voltia to quickly clear the ads and damage the shield.
Phase Two
Focus on the boss, using your abilities to deal with the new shield phase. Be ready to destroy any protective pylons the boss activates.
Intermission Two
Three ads will appear like in the first intermission; use the Vula to clear them quickly.
Phase Three
Save your ultimate for this phase to quickly take down the boss’s final health bar. The boss will keep calling in ads and activating shields, but using your abilities and the Voltia well will ensure a quick win.
Parting Thoughts
The Void Vessel Mission is an important part of The First Descendant, full of challenges and rewards.
By following this complete guide, you’ll be well-prepared to tackle the mission confidently. Focus on your build, understand the mission details, and improve your strategy to farm this content efficiently.
Remember to use the target reward system for extra benefits. Keep up with new strategies as the game changes.


