Delta Force: Extraction, a tactical shooter game, has seen big changes since its launch, especially in how damage, ammo types, and armor work.
This guide will help you understand these important parts of the game, so you can make smart choices about your gear and how to shoot enemies.
How Damage Works
Basic Damage and Body Parts
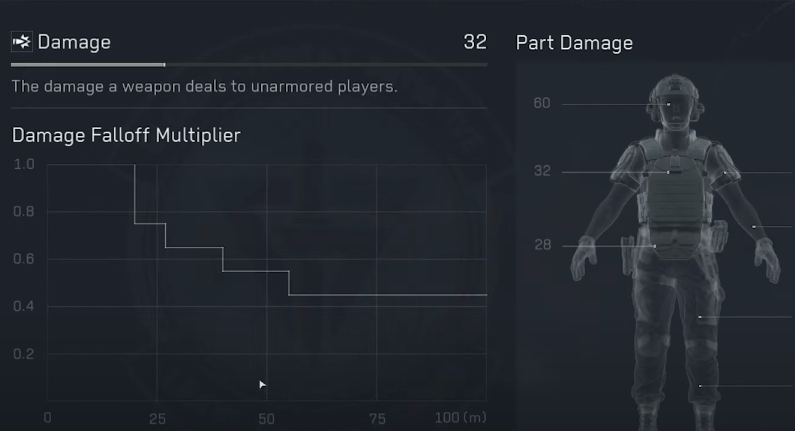
Each gun in the game has a basic damage number, which is what it does when you hit an enemy’s upper chest without armor. For example, the Vector submachine gun does 32 damage.
But the actual damage changes based on where you hit:
- Upper Chest: 100% of basic damage.
- Stomach: 90% of basic damage.
- Head: 190% of basic damage.
- Arms and Legs: 40% of basic damage (down from 60% before).
Damage Drop-off
Guns also do less damage the further away you are. Each gun has a set distance where it does full damage. After that, the damage goes down. For instance:
- The Vector does full damage up to 20m. At 50m, it only does about half damage.
- Assault rifles usually shoot further (like 40m) before losing damage.
The game might show rounded numbers, but it actually uses more exact numbers when figuring out damage.
Ammo Types
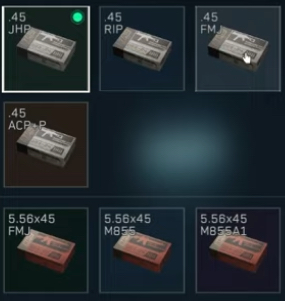
The game has different kinds of ammo, each with its own ability to go through armor:
- Tier 1 (White): Does 120% damage.
- Tier 2 (Green): Does 120% damage.
- Tier 3 (Blue): Does 100% damage.
- Tier 4 (Purple): Does 100% damage.
- Tier 5 (Gold): Does 100% damage.
- Tier 6 (Red): Available for some guns.
There’s also a special Tier 3 ammo called RIP ammo:
- Can’t go through armor at all.
- Does 180% damage.
- Really good against enemies without armor or when hitting arms and legs.
- Makes enemies bleed a lot and hurts their arms and legs badly.
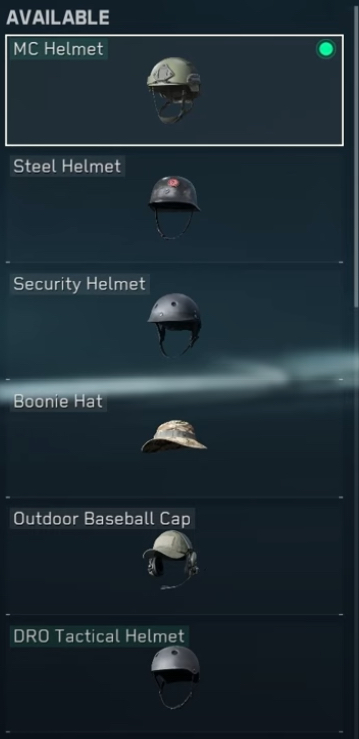
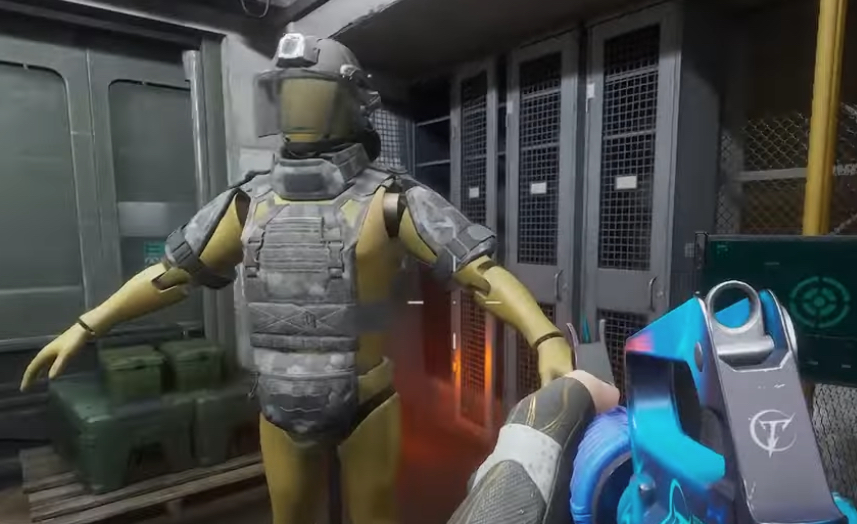
Armor System
Armor in the game comes in tiers, just like ammo:
- Tier 1 (White)
- Tier 2 (Green)
- Tier 3 (Blue)
- Tier 4 (Purple)
- Tier 5 (Gold)
Each piece of armor (vest or helmet) can take a certain amount of damage before it breaks.
How Ammo and Armor Interact
Understanding how ammo works against different armor is really important:
- Ammo vs. Armor 2+ tiers lower: Goes right through, does full damage.
- Ammo vs. Armor 1 tier lower: Does 75% damage.
- Ammo vs. Same tier Armor: Does 50% damage.
- Ammo vs. Higher tier Armor: Does no damage until the armor breaks.
For example, Tier 4 (Purple) ammo against:
- Tier 2 (Green) armor: Goes through, does full damage.
- Tier 3 (Blue) armor: Does 75% damage.
- Tier 4 (Purple) armor: Does 50% damage.
- Tier 5 (Gold) armor: Does no damage until armor breaks.
How Long Armor Lasts?
Better armor usually lasts longer. For example:
- Tier 2 (Green) vest: Can take 50 damage.
- Tier 5 (Gold) vest: Can take 115 damage.
Guns that are better at going through armor will break it faster.
How Fast You Can Kill Enemies?
How quickly you can kill enemies in Delta Force: Extraction depends on your gun, ammo, their armor, and where you hit them. Here are some examples:
CAR-15 (Slow killing gun)
Using Tier 4 (Purple) ammo:
- No armor: About 300ms (milliseconds).
- Tier 3 (Blue) armor: About 400ms.
- Tier 4 (Purple) armor: About 500ms.
- Tier 5 (Gold) armor: About 700ms.
Vector (Fast killing gun)

Using Tier 4 (Purple) ammo:
- No armor: About 100ms..
- Tier 3 (Blue) armor: About 200ms.
- Tier 4 (Purple) armor: Less than 300ms.
- Tier 5 (Gold) armor: About 400ms.
Headshots
Headshots kill much faster for all guns:
Vector (Tier 4 ammo):
- No armor: About 60ms.
- Tier 3 (Blue) armor: About 60ms (still kills in two shots).
- Tier 4 (Purple) armor: About 100ms.
- Tier 5 (Gold) armor: Less than 200ms.
CAR-15 (Tier 4 ammo):
- No armor: About 100ms.
- Tier 3 (Blue) armor: About 200ms.
- Tier 4 (Purple) armor: About 200ms.
- Tier 5 (Gold) armor: About 300ms.
What This Means for You?
Understanding all this can really help you play better. Here are some key things to remember:
- Choosing Ammo: Use ammo that’s as good as or better than the armor you think enemies will have.
- Picking Armor: Better armor protects you more, but remember that matching or better ammo can still hurt you.
- Where to Aim: Try to shoot for the head whenever you can. It kills fastest no matter what armor they have. If you can’t hit the head, aim for the upper chest.
- Picking Guns: Think about both how much damage each shot does and how fast the gun fires.
- Managing Distance: Know how far your gun works best. Try to fight enemies within that range.
- Shooting Arms and Legs: Usually not as good, but can be useful with RIP ammo or if the enemy’s body armor is broken but their helmet isn’t.
- Breaking Armor: Against tough armor, keep shooting the same spot to break it, then finish them off.
- Reaction Time: Most people take about 200-250ms to react. Guns that kill faster than this give you a big advantage.
By learning these things, you can make better choices about your gear and change how you play in different fights.
Whether you like to wear lots of armor or move fast and hit hard, understanding how damage, ammo, and armor work together is key to winning in Delta Force: Extraction.
Remember, the game might change with updates, so keep an eye out for any changes to these systems.