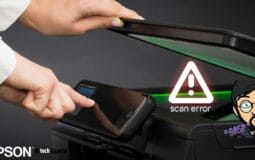
Epson is one of the renowned brands in scanners. Since its launch, it has successfully provided satisfaction to its customers. Nonetheless, Epson users often face issues like the Epson scanner not working. If you are dealing with the same problem, you can go through this article to learn how to fix it.
You can resolve the EPSON scanner not working issue by checking the below factors when the scanner is having trouble scanning.
- Confirm that the scanner driver is installed.
- Confirm that the scanner and computer are connected and that the computer is turned on.
- Confirm that the default scanner is selected in Windows.
- Confirm that the correct scanner is selected in your application software.
After troubleshooting your Epson Scanner, apply the solutions mentioned in the post to ensure the Epson scanner is working correctly.
Troubleshooting Epson Scanner Not Working
I get it Epson scanner isn’t working for you. But don’t jump right away looking for solutions. Instead, first, troubleshoot the scanner to see what’s causing the error.
USB cable connected/disconnected?
- Check the USB cable connection.
- If it is appropriately connected, then check if the cable is damaged.
- If the cable is damaged, then connect the scanner with another line.
- If the scanner is not working even after connecting the cable with another cable, try to connect the scanner with the other USB port.
Is your scanner driver outdated?
An outdated scanner driver can lead to the device not working issues.
To check if the driver is outdated:
- Click “Start” on your desktop, then “Control Panel.” If you are using Windows 10, click the Start button and click “Run.” Type in “devmgmt.MSC” in the empty box and press Enter. This will open Device Manager, which contains all of your computer’s drivers.
- Double-click on “Imaging Devices” to expand the category, and double-click again on your Epson scanner model to access its Properties window from which you can see information about the status of its driver under the Driver tab (the Status field will tell you if it is working).
5 Solutions to Fixing the Epson scanner not working Error?
Restart your EPSON scanner
Restarting the scanner is one of the easiest and most effective solutions to software-related problems. It’s also a go-to solution that fixes many issues related to drivers, so let’s begin with it. To restart your EPSON scanner:
- Simply turn off your scanner and unplug it from the wall socket.
- Leave it off for 30 seconds or so, then plug it back in and turn it on again.
Uninstall and reinstall the scanner driver
If you have already upgraded from Windows 7 to Windows 10, follow these steps:
- Go to Control Panel and click on View Devices & Printers under Hardware & Sound settings.
- Right-click on your Epson scanner model name (if it is not listed in the device list) and select Remove Device.
- Once removed, go to the official Epson website, search your scanner model name and install its latest driver version. Next, please turn off your printer for a few seconds, then turn it back on again.
- Open Epson Scanner and see if it is working now or not!
Or else, you can automatically update the scanner driver using Driver Booster 8.
Update driver software
To update the scanner driver, you need to follow these steps:
- Open the Device Manager. You can do this by clicking on the Windows logo and typing “Device Manager” in the search bar. Click on the first option that comes up.
- Right-click on the scanner driver and then select Update Driver Software.
- Choose the automatic driver update method and ensure it works correctly when you restart your computer. If not, follow these steps:
- In the Device Manager, right-click on your Epson Scanner again and go to Properties>Driver>Update Driver Software>Browse my computer for driver software>Let me pick from a list of device drivers on my laptop>EPSON V500/GT-X800/XX00/XX50/XX70/XX80/XX90 (USB) EPSON Scanner XXXX series Ver5.2.2.1 (EpsonScan). Then click OK and close all windows before restarting your system again.
Run Hardware Troubleshooter
To run the hardware troubleshooter, follow these steps:
- First, open Control Panel by typing ‘control panel’ in the search box on the Taskbar.
- Click Troubleshooting and click View all in the left pane to view all troubleshoot available for your system.
- Locate the Hardware and Devices troubleshooter from the list of available troubleshooters and click on it to open it.
- Click Next and follow on-screen instructions to run a scan of your system to detect any errors or issues that may have been causing problems with your scanner’s performance. Once any errors are detected, they will be fixed automatically, restoring your scanner’s functionality.
Epson scanner not working after windows 11 update.
As you already know, I had previously installed Windows 11 on my PC. Then soon after installation, I realized it was not compatible with specific hardware and software, and Epson Scanner was one of them.
I raised the issue to Epson via their Twitter account & thankfully, they rolled an update within a week. But if you own an older Epson scanner, you might not be that lucky.
P.S. Even though it’s been over 6 months since the official release of Windows 11, it’s not yet compatible with every hardware & software. There I wouldn’t recommend you to use an Epson scanner with a Windows 11 PC.
Concluding Lines
After troubleshooting your Epson scanner, I hope you would be able to use 5 solutions to get rid of the Epson scanner not working error forever.
That’s all for now.
If you’re stuck somewhere in the process of fixing the Epson scanner not working error, do let us know in the comments section below.


