You need monitor testing and diagnostic tools to fix white dots on your monitor for several reasons. White dots, or white pixels, mainly occur due to issues with your monitor’s hardware or with your computer’s graphics drivers.
Firstly, certain issues with your graphics drivers could lead to white dots appearing on your screen. By using monitor testing and diagnostic tools, you could identify problems with your graphics drivers. If these tools highlight any issues, you might need to update or roll back your drivers to fix the problem.
Secondly, you might see white dots on your monitor if there are “dead” or “stuck” pixels. These are pixels that are always on (resulting in a white dot) or always off (making a black dot). Monitor testing and diagnostic tools could help identify these problematic pixels.
Lastly, using these tools can provide a proactive means to spot potential issues before they manifest visually.
So, if you’re up to fixing the white dot issue, try these 5 software to fix it.
5 Software to Fix the White Dot on Monitors
Tool 1: DisplayCAL (Windows, Mac, Linux)
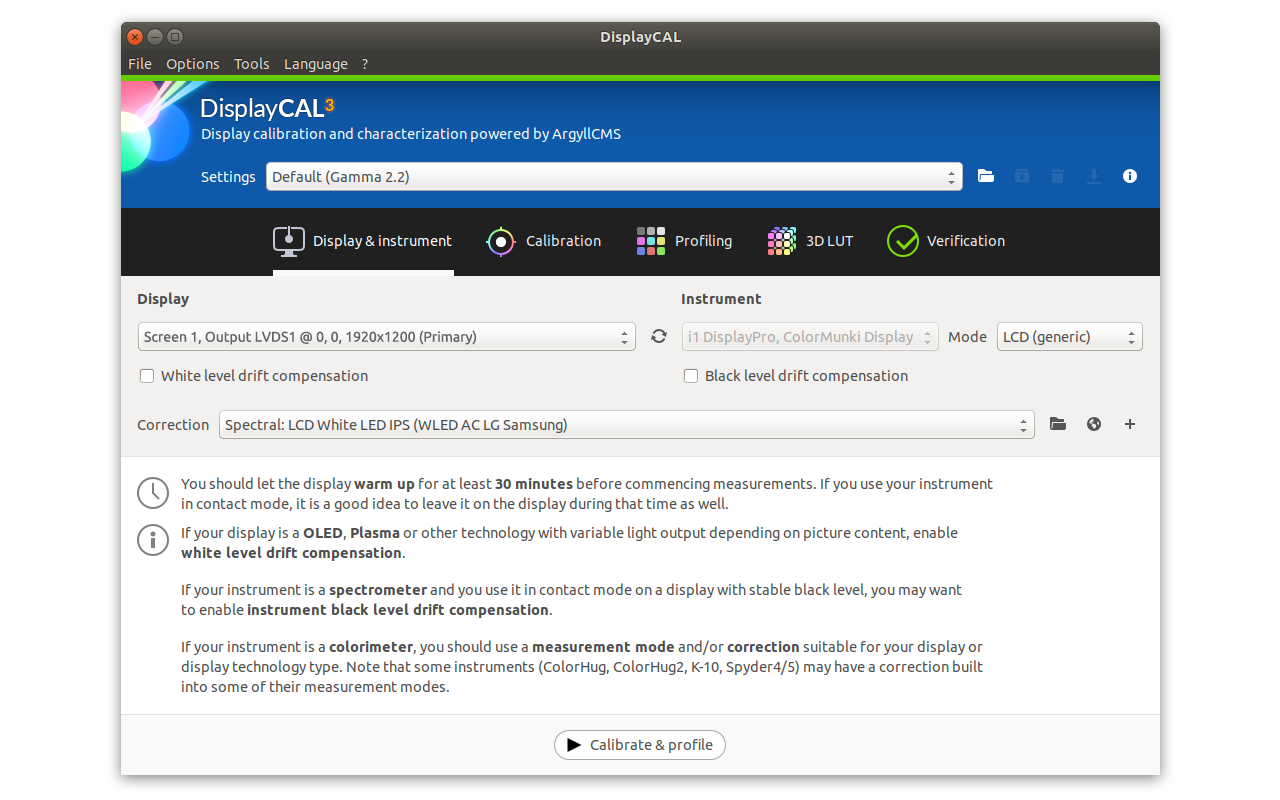
DisplayCAL is free, open-source software available for Windows, Mac, and Linux. It’s mainly used for display calibration and characterization, meaning it helps you adjust your monitor’s settings for the best possible picture and color accuracy.
DisplayCAL is very effective in identifying problems with your monitor’s color accuracy or grid pattern consistency. If your monitor shows some different colors instead of the standard ones or if there’s an irregular grid pattern, DisplayCAL can probably help address these issues.
For example, you could realize that your monitor is showing green as a little too blue. Now, you might not notice this during your everyday computer use, but it could throw off everything from photo editing to game colors. By using DisplayCAL, you can adjust your monitor so the colors are as accurate as possible.
Here’s how to use DisplayCAL:
- Download and install the software from the DisplayCAL website.
- Connect a colorimeter to your computer (this is a tool that measures the color of light). If you don’t have one, you can use DisplayCAL’s visual calibration guide, which leads you through adjusting settings by eye.
- Start the software. It will recognize your color meter (if you have one) and show your display’s current settings.
- Follow the prompts to start calibrating your monitor. You can compare your monitor’s colors to a reference image, adjust settings, and analyze how your display performs.
Tool 2: Monitorian (Windows)
Monitorian is a Windows app that you can get for free from the Microsoft Store. It’s a very handy tool if you use more than one monitor. What Monitorian does best is to let you adjust and synchronize brightness levels for multiple monitors at once.
Monitorian can help you out if you’re finding weird differences in brightness levels across your screens. For instance, if one monitor seems to be a bit darker or brighter than the others, you can adjust the brightness levels easily to make them all match.
Here’s how to use Monitorian:
- Download Monitorian from the Microsoft Store and install it on your computer.
- After installation, a small sun-like icon will appear in your system tray. Click on it.
- A list of all the monitors connected to your computer will show up, each with its brightness slider.
- Adjust the sliders to your preferred brightness level. If you have more than one monitor and want them all to have the same brightness, just adjust one slider – the others will automatically match it.
Just keep in mind that Monitorian might not work with all monitors, especially older ones. But for most modern monitors, it’s a really useful tool for controlling brightness effectively.
Tool 3: Eizo Monitor Test (Online)
The Eizo Monitor Test is a free, web-based tool that lets you analyze your monitor’s performance through a range of visual and interactive tests. Being an online tool, it works across various operating systems, like Windows, Mac, and Linux, and doesn’t require any downloads or installations.
Eizo Monitor Test includes multiple test options to evaluate your screen’s performance, such as resolution, colors, gradients, presence of dead or stuck pixels, and uniformity. It is useful for identifying and fixing issues related to your monitor’s display.
Here’s how to use the Eizo Monitor Test effectively:
- Open your favorite web browser and visit the Eizo Monitor Test website.
- On the website, you will find a list of different tests, such as “Test A: Adjustment” and “Test B: Clock & Phase,” among others.
- Click on one of the tests to begin. It’s a good idea to work through them to perform a comprehensive examination of your monitor’s performance.
- Follow the instructions for each test, paying close attention to the prompts and guidelines. They might ask you to look for certain visual aspects, such as patterns or colors, and to adjust your monitor settings accordingly.
- After completing all the tests, you will have a detailed understanding of your monitor’s performance. If you identify any issues throughout the tests, you can use this information to take further action, such as recalibrating your monitor, updating your graphics drivers, or considering a professional repair.
Tool 4: Dead Pixels Test (Web Application)
The Dead Pixels Test is a simple web app that allows you to quickly check if your monitor has any dead or stuck pixels. No installations or downloads are required; you just need an internet connection and a web browser.
This web app works by displaying screens of different solid colors on your monitor, allowing defects, dead pixels, or stuck pixels to stand out against the uniform color background. Dead pixels are pixels that remain black regardless of the color they’re supposed to display, while stuck pixels display a constant color regardless of the color they’re supposed to show.
Here’s how to use the Dead Pixels Test:
- Open your web browser and navigate to Dead Pixels Test.
- Upon opening the site, you can choose to run a quick test or a longer, more in-depth test.
- Clicking on one of the tests will cover your screen with a solid color. Scan your screen carefully for any pixels that do not match the displayed color.
- You can manually change the color of the screen by clicking on the colored squares on the web page. This helps in identifying stuck pixels that may only be visible in certain colors.
Tool 5: TestUFO (Web Application)

TestUFO is an excellent free, web-based tool designed by Blur Busters to spot problems with your monitor’s response time and detect any motion blur artifacts. This tool is particularly useful for gamers and video enthusiasts, as they often require monitors with fast refresh rates and superior motion handling.
TestUFO includes multiple tests for evaluating your monitor’s refresh rates, frame rates, and motion blur. It can highlight potential stuttering, ghosting, or tearing – issues that can affect the smooth rendering of fast-moving images.
Here’s how to use TestUFO effectively:
- Open your web browser and go to the TestUFO website.
- On the website, you’ll find a list of different tests ranging from “Frame Skipping Check” to “Ghosting Test” and “Vertical Scrolling Text” among others.
- Click on one of the tests to start. It’s a good idea to work your way through each test to thoroughly evaluate your monitor’s performance.
- Follow the instructions within each test, paying close attention to the screen as the test runs.
- Based on the test results, you can adjust your monitor’s settings or consider getting a new one if your current monitor’s performance does not meet your needs or standards.
Remember, TestUFO requires V-Sync to be turned on and your web browser should be up-to-date and hardware acceleration enabled for accurate testing.
Parting Thoughts
Fine-tuning your monitor can be a difficult task, but with these 5 tools, it becomes considerably easier. These resources help identify and fix potential issues, ensuring optimal monitor performance.
That’s all for now.
If you’re stuck somewhere in the process of using either of these 5 softwares, feel free to share your thoughts in the comments below.