Has your Dell laptop’s microphone malfunctioned when you need it most during important virtual meetings or work-from-home sessions?
Microphone failures can be incredibly frustrating, interrupting your workflow and affecting communication during crucial moments. It could be hardware, software, or an unreachable issue causing your troubles.
Fear not! This concise guide lists 8 effective ways to fix your Dell laptop’s microphone. Let’s start with the list of solutions –
1. Check the Physical Hardware.

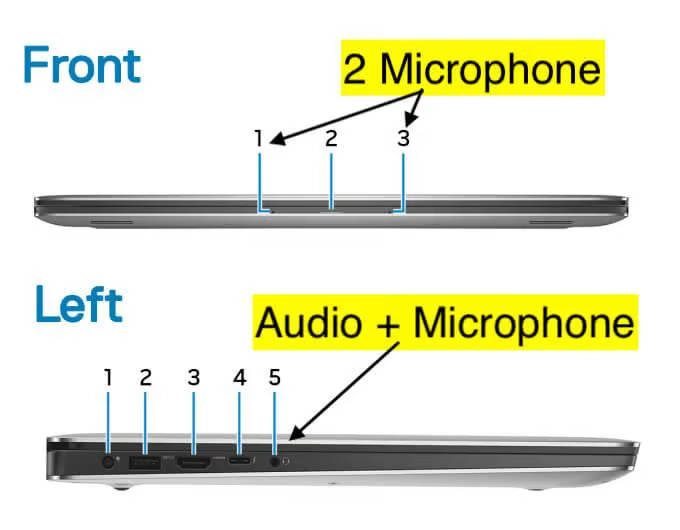
Sometimes, hardware damage could be the cause of microphone failure. The microphone, just like other hardware components, is susceptible to physical damage, including loose connections, broken wires, and physical deformations. If using an external microphone, check the USB or 3.5mm jack to ensure it’s not bent, broken, or damaged.
Dust, lint, or other small debris occasionally block the microphone, restricting its sensitivity or rendering it completely non-functional. A blast of compressed air could help clear any blockages but remember to be gentle to avoid causing further damage.
2. Check the Microphone Settings
Once you’ve ruled out any physical damage, it’s time to check the settings on your laptop. Occasionally, the issue can be as simple as settings that have been accidentally changed.
Verify Microphone is not Muted.
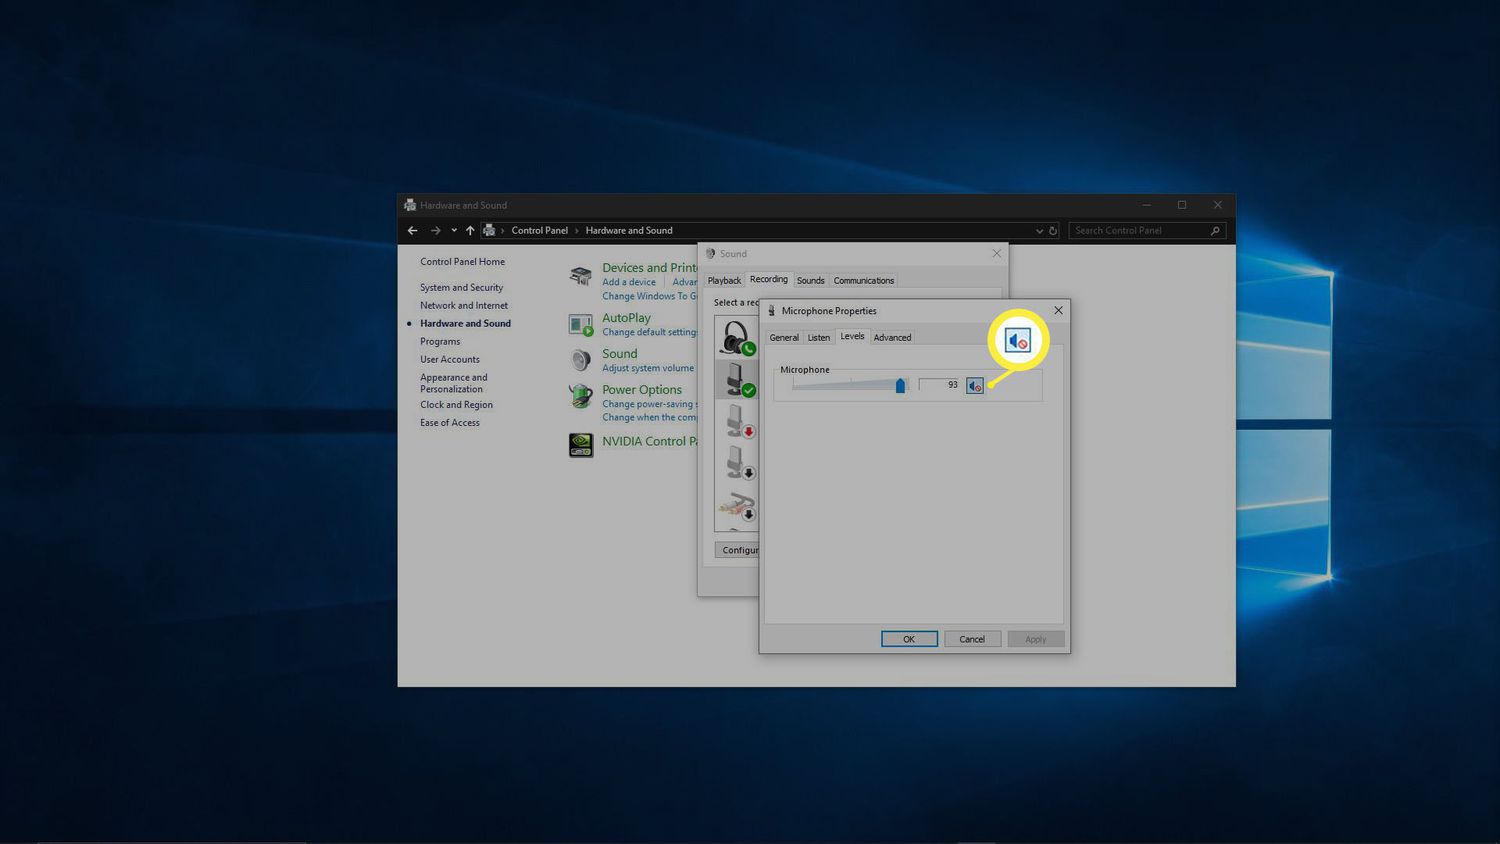
The Dell laptop microphone may be muted, which is quite an easy fix. You need to check the taskbar for the speaker icon, right-click on it, select “Open sound settings”, and ensure the input volume is not turned down or muted.
Set Microphone as the Default Device
Sometimes, your laptop might not recognize your microphone if it’s not set as the default device. You can check this by navigating to the ‘Sound Settings’ in the Control Panel, selecting the ‘Recording’ tab, and setting your microphone as the default device.
3. Update the Audio Driver

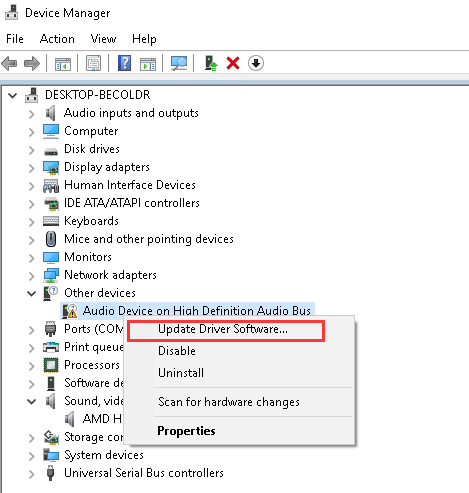
An outdated driver can sometimes cause audio issues, including the microphone not working properly. Keeping your drivers updated ensures optimum performance.
How to Update the Audio Driver?
- Go to the Dell website, specifically the ‘Support’ page, and enter your laptop’s model number. Look for the most recent audio driver compatible with your model and download it.
- After successfully downloading the driver, navigate to the file location, double-click the installer, and follow the prompts to update the audio driver.
- Remember to restart your laptop after the driver installation, as the changes may not occur without a restart.
4. Using Dell’s Diagnostic Tool
Dell provides a useful diagnostic tool that could assist in identifying the issue with your laptop’s microphone.
How to Use Dell Diagnostic Tool?
- Navigate to Dell’s “Diagnostic Solutions” page on the Dell website.
- Download and install the Dell SupportAssist app.
- Once installed, open SupportAssist, select “Hardware Checkup,” and choose “Run Quick Test.”
- If the microphone is included in the test list, check it.
These tests will provide codes that correspond to issues found. You can reference Dell’s error code list to understand what these mean and then take the appropriate steps to address them.
5. Disable Audio Enhancements
Audio enhancements can occasionally interfere with the normal functioning of your microphone despite being meant to improve sound quality.
How to Disable Audio Enhancements?
- Look for the speaker icon on the taskbar, right-click, and then select “Sounds.” This opens a dialogue box; head over to the “Playback” tab, select “Speakers,” and then select “Properties.”
- Once in the speakers’ properties, navigate to the “Enhancements” tab.
- You’re good to go if the tab isn’t there, which might be the case with some configurations.
- If it is, check the “Disable all enhancements” checkbox and hit “Apply” then “OK.”
- Now, your previously enabled audio enhancements are disabled. Test your microphone again for improvements.
6. Adjust the Microphone Level

Adjusting the microphone level can sometimes resolve issues with low input volume or a non-responsive microphone.
How to Fine-Tune the Microphone Level?
- Find the tiny picture of a speaker on the bottom bar of your screen and right-click it.
- A small menu will pop up. Left-click on “Open Sound settings”.
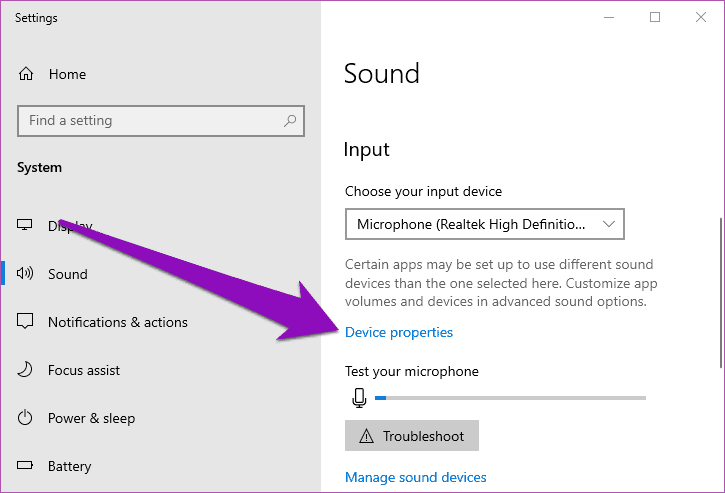
- Look for “Input” on the new screen and scroll down.
- Under “Input,” ensure the correct microphone is selected (it’s the one you want to fix).
- Find and click on the words “Device properties”.
- Here, you’ll see a bar that you can move up and down. This is for the loudness of your microphone. Set it to your desired level, but don’t make it too quiet.
- The last step is to test if your microphone is now working better. You can do this by recording your voice or joining a call to see if others can hear you well.
7. Use Windows Troubleshooter
The Windows Troubleshooter is a built-in utility that can help identify and resolve issues with your microphone.
Steps to Launch the Windows Troubleshooter
- Press the ‘Windows’ key, type “Troubleshoot” in the search bar, and then select “Troubleshoot settings” from the search results.
- In the “Troubleshoot” section, scroll down to “Find and fix other problems.”
- Click “Recording Audio” and select “Run the troubleshooter.”
8. Restart the Audio Services
Restarting certain related audio services can help reset them and might fix unresolved issues.
How to Restart the Windows Audio Services?
- Press Win+R to open the Run dialog box.
- Type services.msc and press Enter to launch the Services window.
- In the Services window, look for and right-click on the following three services: ‘Windows Audio,’ ‘Windows Audio Endpoint Builder,’ and ‘Remote Procedure Call (RPC).’
- For each, select ‘Restart’ from the dropdown menu (if the services are running) or ‘Start’ if they were stopped.
Final Words
In conclusion, these simple and effective solutions can easily resolve microphone issues on your Dell laptop.
Be it adjusting settings, updating drivers, or utilizing built-in Windows tools, you can solve these problems head-on. Remember, rather than a burden, technology is here to be an enabler.


