If you’re experiencing GPU issues such as low FPS, black screens, game crashes, or sluggish and unstable performance, this guide will walk you through using Display Driver Uninstaller (DDU) to completely clean and install your GPU drivers.
This method can resolve graphics-related problems by removing old drivers and ensuring your system uses the latest drivers available.

9 Steps Guide to Fixing Common GPU Errors
Step 1: Identify Your GPU
Before beginning, you need to know which GPU you’re using. If you’re unsure, follow these steps:
- Open Task Manager by right-clicking on the taskbar and selecting it.
- Navigate to the Performance tab.
- Scroll down to find the GPU section. Here, you will see the name and model of your GPU.
Step 2: Download the Latest GPU Drivers

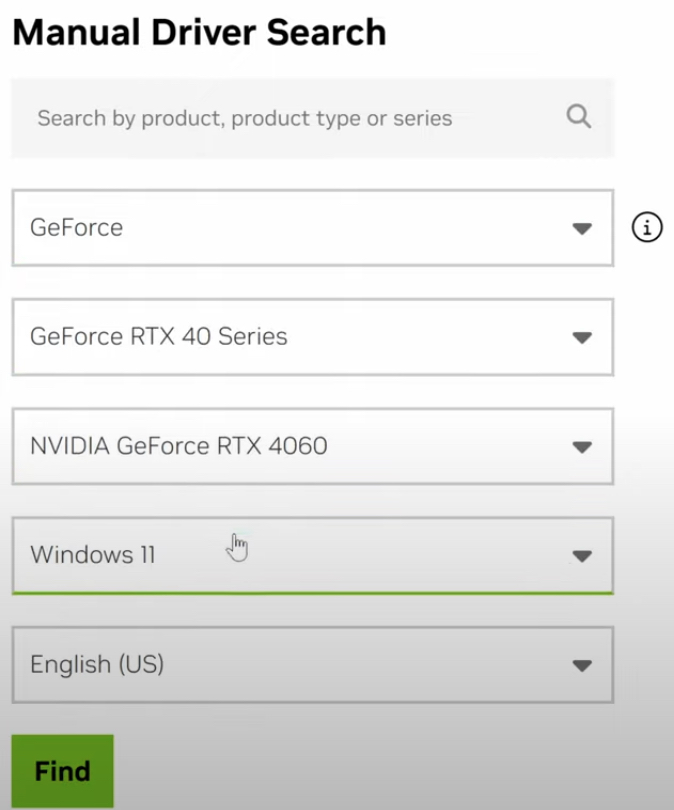
Next, download the latest drivers for your specific GPU. Follow these instructions based on your GPU manufacturer:
- Nvidia Users:
- Go to Nvidia’s driver page.
- Manually select your GPU model from the options provided.
- Download the Game Ready or Studio driver, depending on your needs.
- AMD Users:
- Visit AMD’s support page.
- Enter your product and model details.
- Download the appropriate driver after performing a manual search.
- Intel Users:
- Head to Intel’s driver page.
- Search for and download the latest driver for your Intel GPU or integrated graphics.
Step 3: Download and Prepare DDU

- Search for “Display Driver Uninstaller (DDU)” on Google.
- Download DDU from reputable sources like Guru3D or Wagnardsoft.
- Extract the contents of the downloaded file to your desktop.
Step 4: Disable Network Connections
To prevent Windows from automatically installing older drivers, temporarily disable your network connections:
- Right-click the network icon in the bottom-right corner of the taskbar.
- Select “Network & Internet settings.”
- Go to “Advanced network settings.”
- Disable all network adapters.
Step 5: Reboot into Safe Mode
Rebooting into Safe Mode ensures a smoother driver uninstallation process:
- Hold the Shift key.
- Click the Windows button > Power > Restart while still holding down Shift.
- Select “Troubleshoot” > “Advanced options” > “Startup Settings” > Restart.
- Press
4to boot into Safe Mode.
Step 6: Use DDU to Uninstall Old Drivers
- Open the DDU folder on the desktop and launch the application.
- Select “GPU” from the device type dropdown.
- Choose your GPU brand (Nvidia, AMD, or Intel).
- Click “Clean and restart.” Your system will reboot after DDU removes the old drivers.
Step 7: Install New Drivers
After your system restarts:
- Locate the new driver you downloaded earlier.
- Run the installation process as per the prompts.
- Opt for any custom settings if required or use the default options.
- Once installation is complete, restart your PC again.
Step 8: Re-enable Network Connections
Re-establish your network connection to complete the process:
- Right-click the network icon in the taskbar.
- Go to “Network & Internet settings.”
- Navigate to “Advanced network settings.”
- Re-enable all network adapters.
Step 9: Final Adjustments
- Set your monitor’s correct resolution and refresh rate via the display settings.
- Open the Nvidia Control Panel, AMD Radeon Settings, or Intel Graphics Settings to reapply any custom configurations.
- Ensure features like G-Sync, FreeSync, and variable refresh rates are enabled if you use them.
- Check and adjust your in-game settings as they may have reset to defaults.
Following these steps, you’ve successfully eliminated old, outdated GPU drivers and installed the latest ones using Display Driver Uninstaller (DDU). This process should enhance your system’s graphics performance and stability. If you found this guide helpful, consider sharing it with others or saving it for future reference.
This step-by-step article should help anyone experiencing GPU troubles by guiding them through the process of using Display Driver Uninstaller.


